
Separate from the Workspace Gallery and Print Shop pricing and shopping cart modules, Invoicing allows you to bill clients professionally and efficiently for projects like portrait sessions, weddings, events etc. Use invoice templates or create custom invoices for one-off projects.
Important: Click here for how Workspace and Queensberry handle tax on your sales in Workspace.
Note: This Invoicing function is available on Pro plans and above.
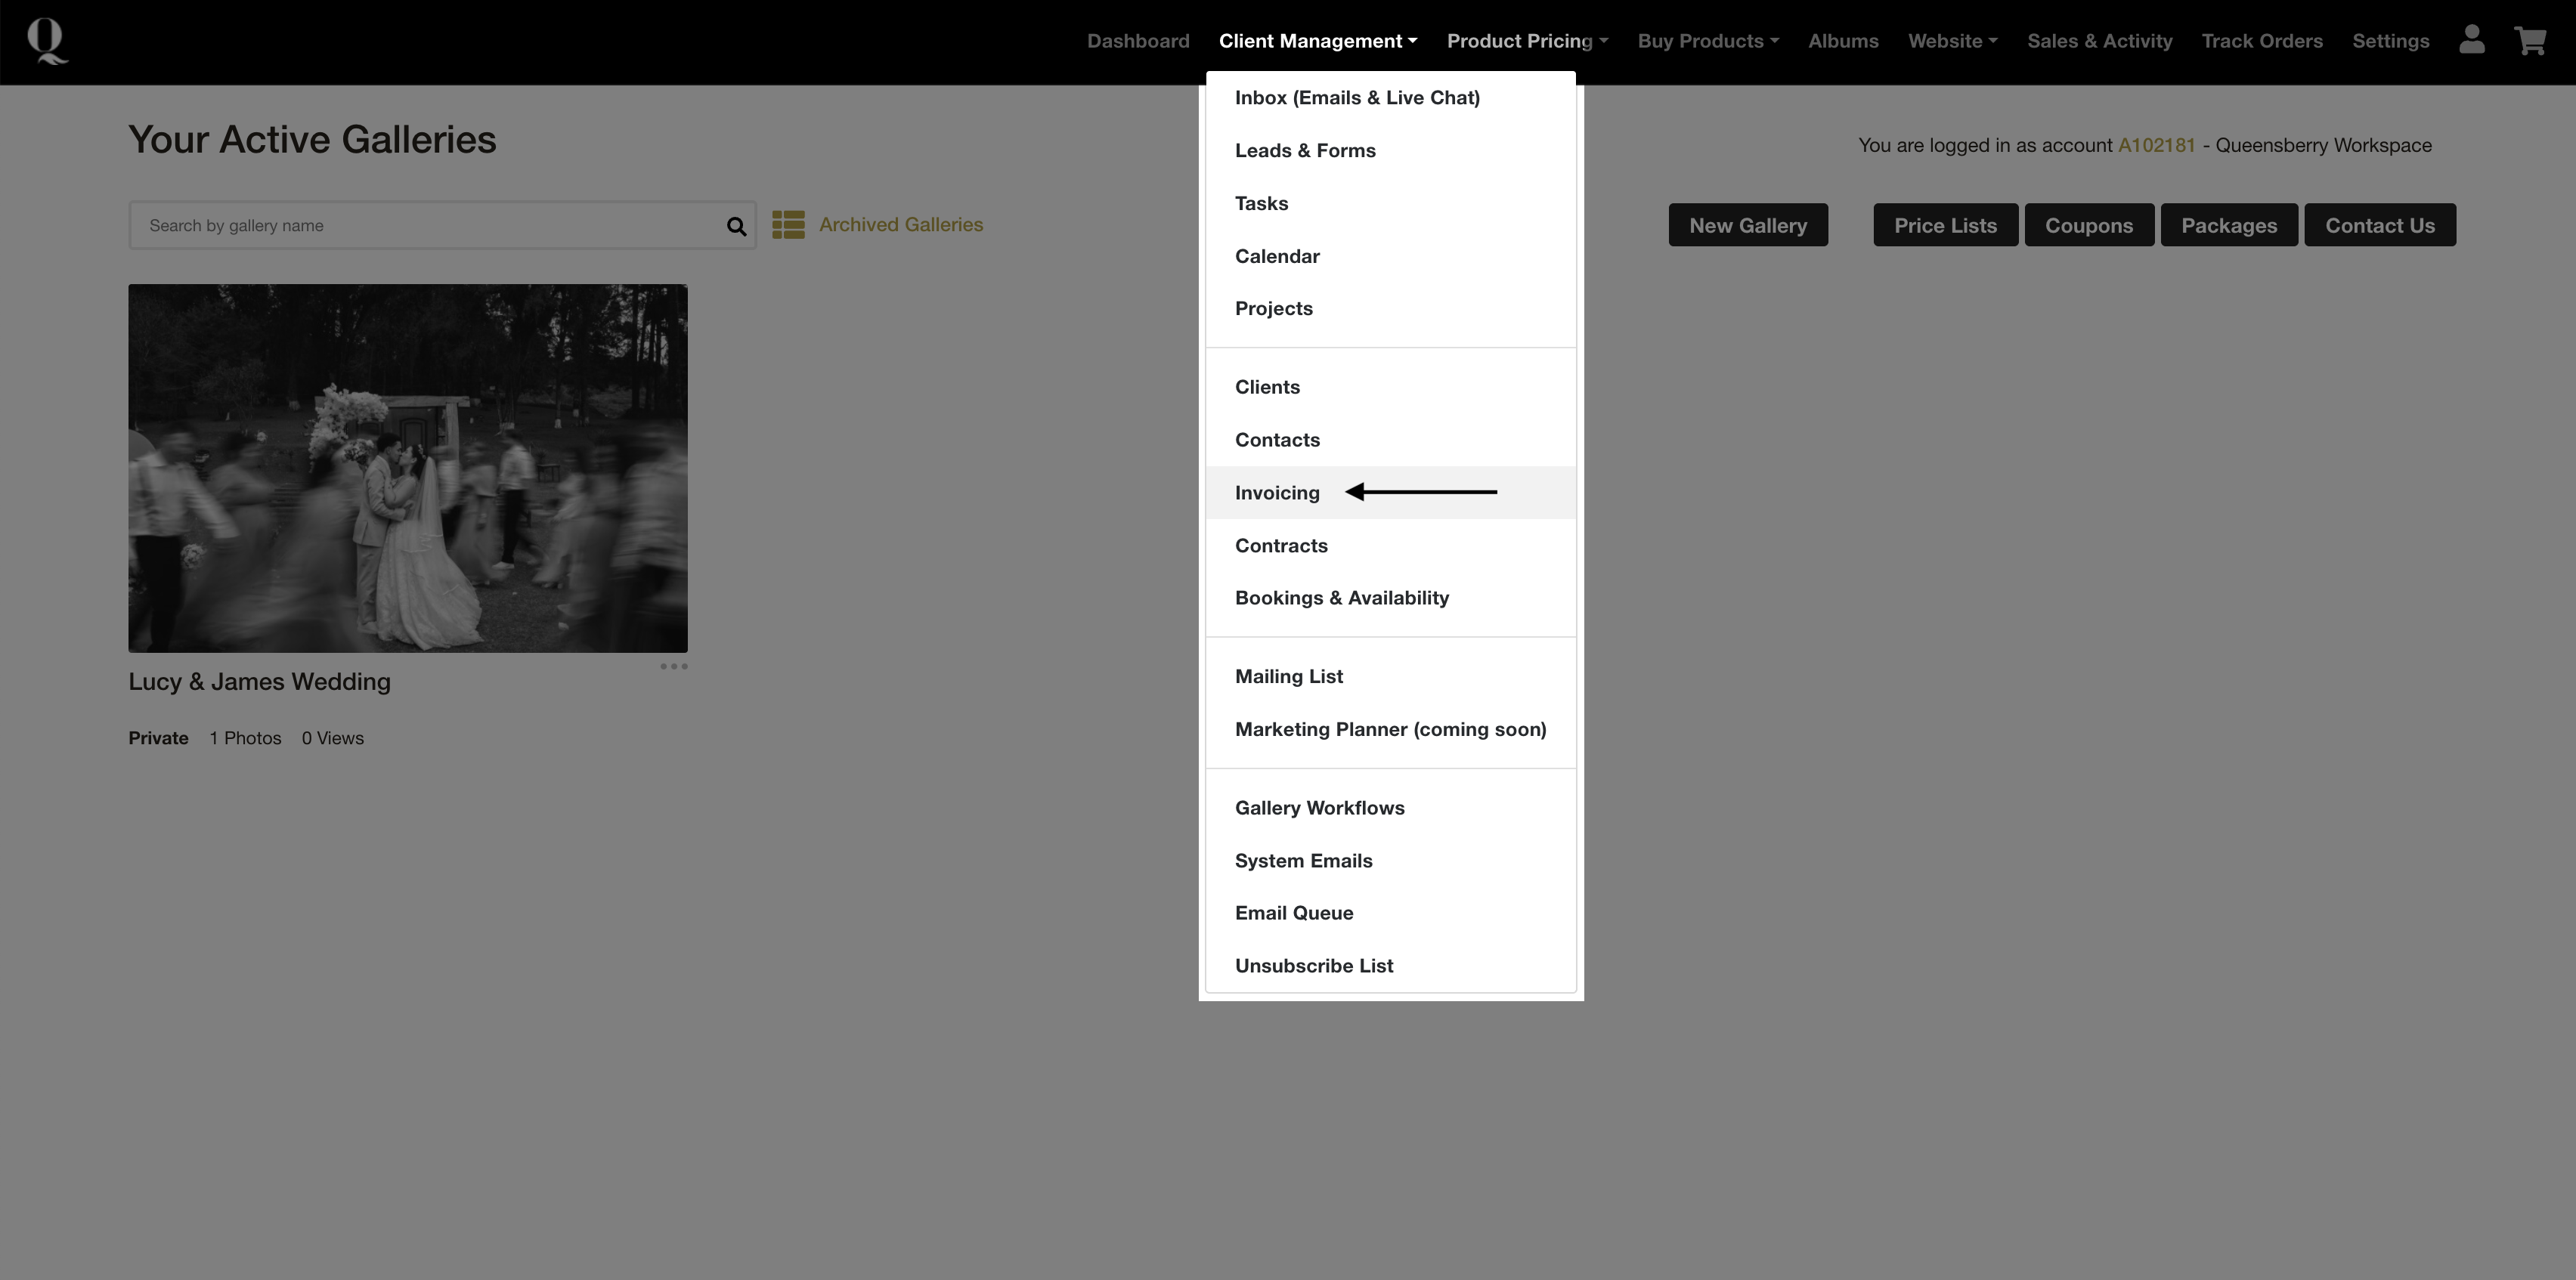
To Access Invoicing
- In Workspace, go to the top navigation menu.
- Select Client Management.
- Click Invoicing.
Creating Invoice Templates
Invoice templates are ideal for services you offer regularly, helping you save time on repeat billing.
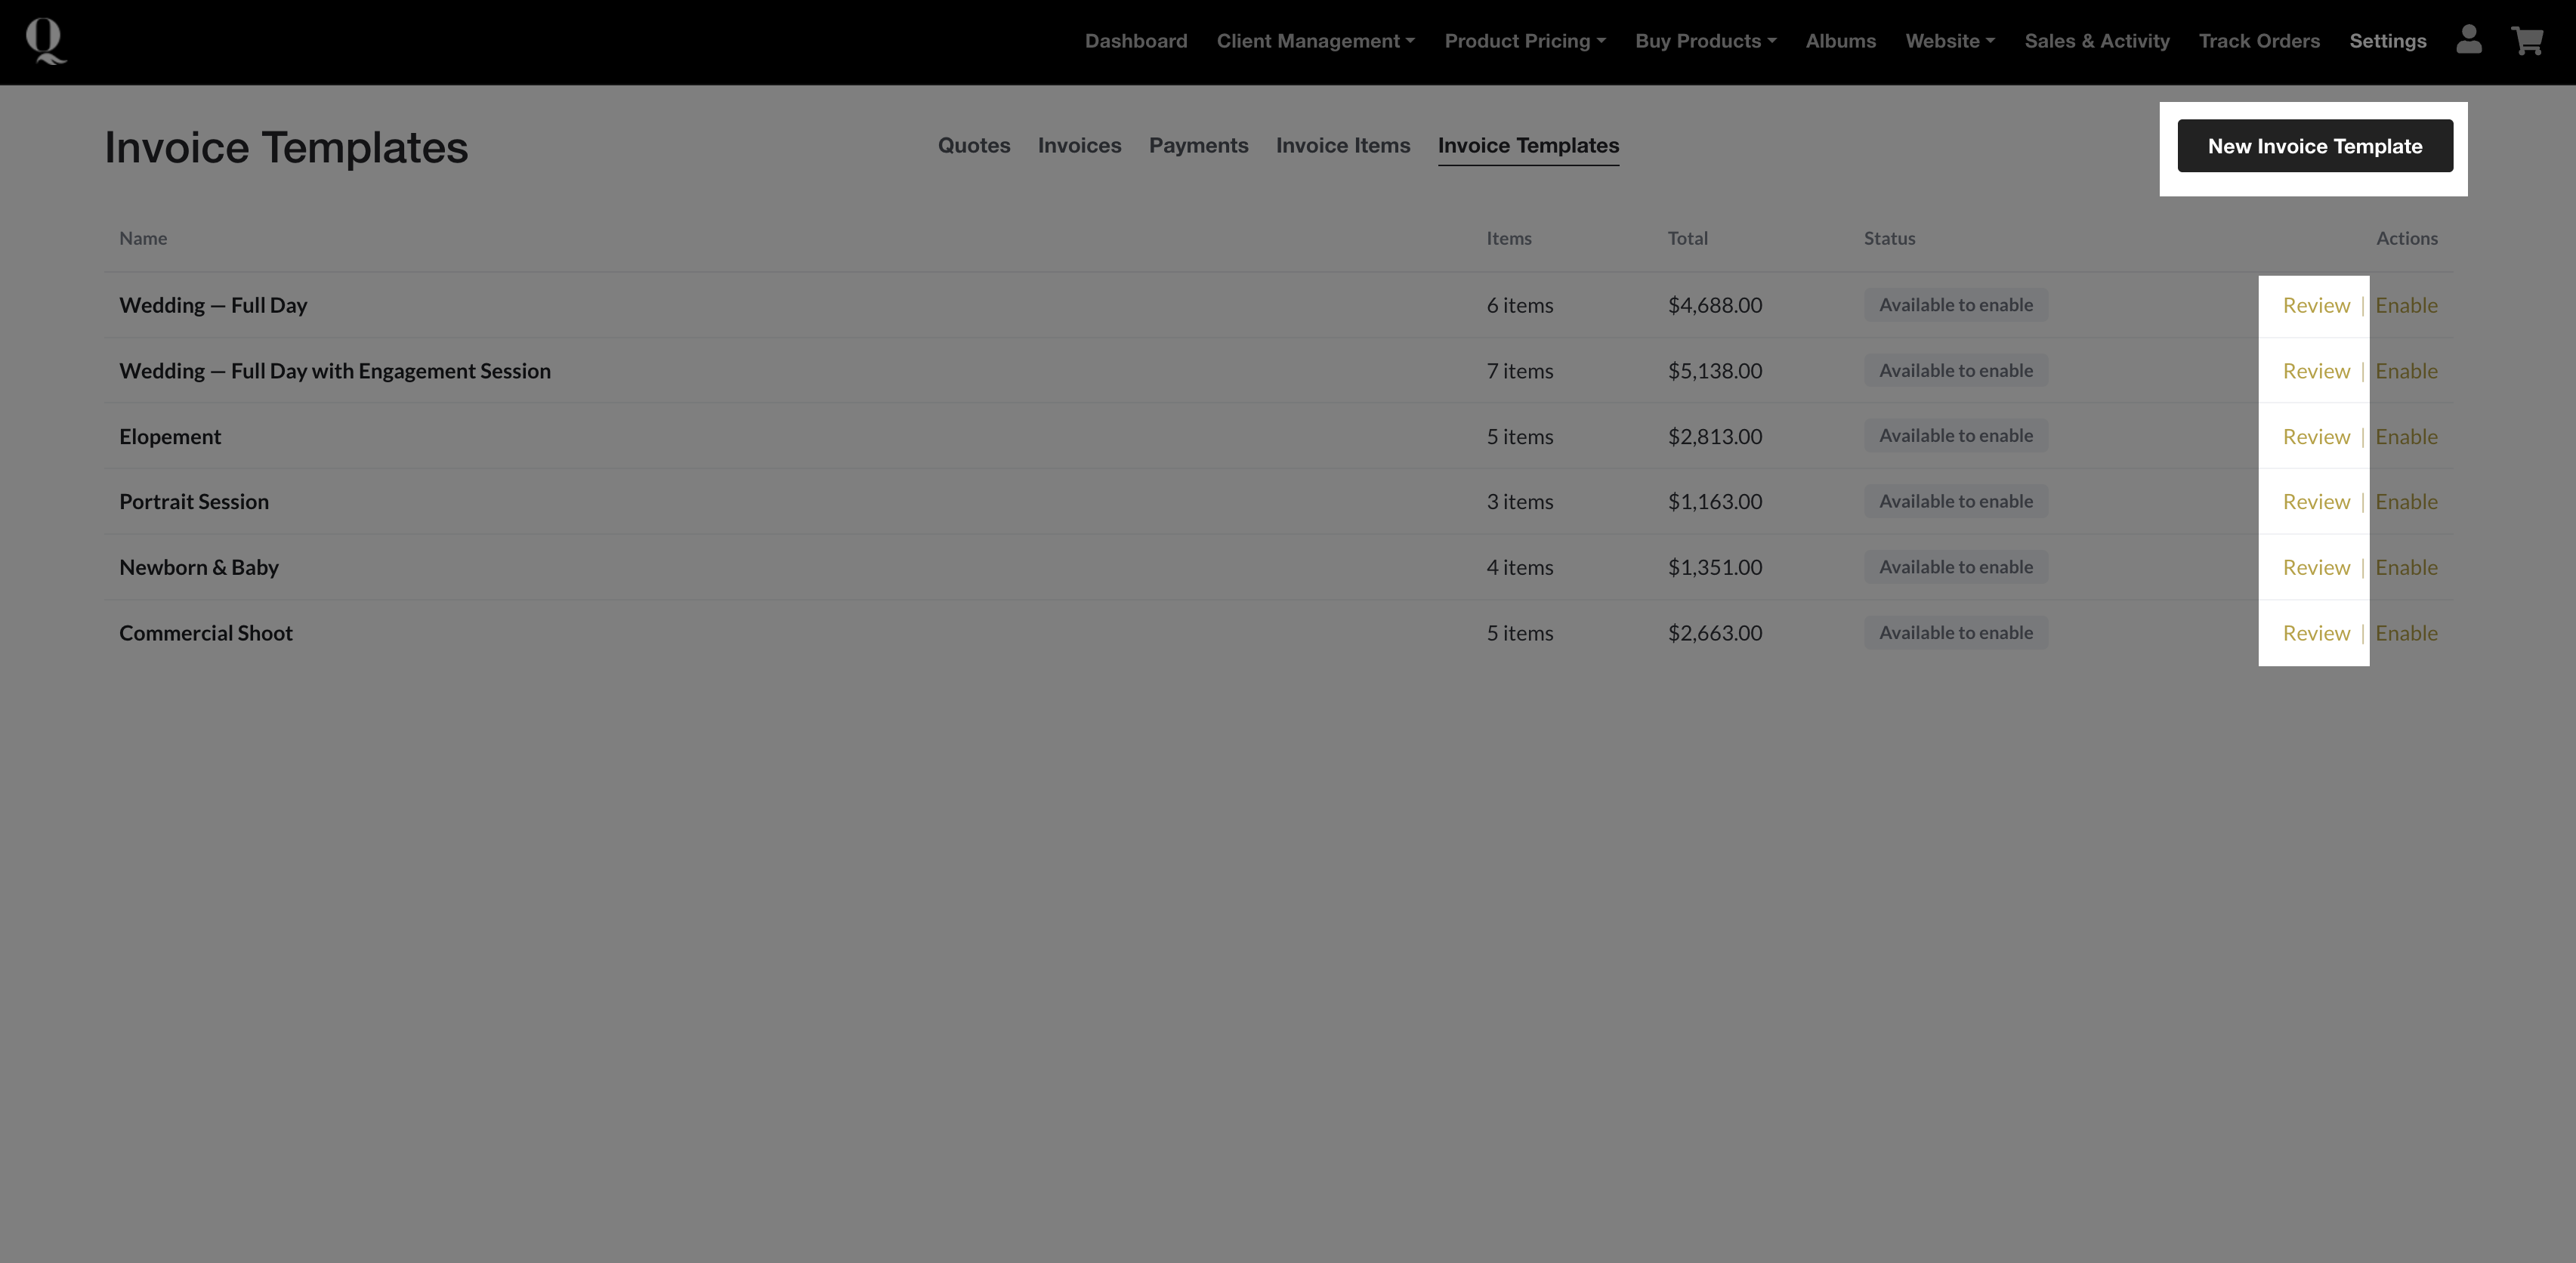
Step 1: Open Invoice Templates
● Select Invoice Templates at the top of the page.
Step 2: Create or Edit a Template
You can either:
● Click Review to edit a pre-set template
or
● Click New Invoice Template to create your own
Step 3: Set Template Details
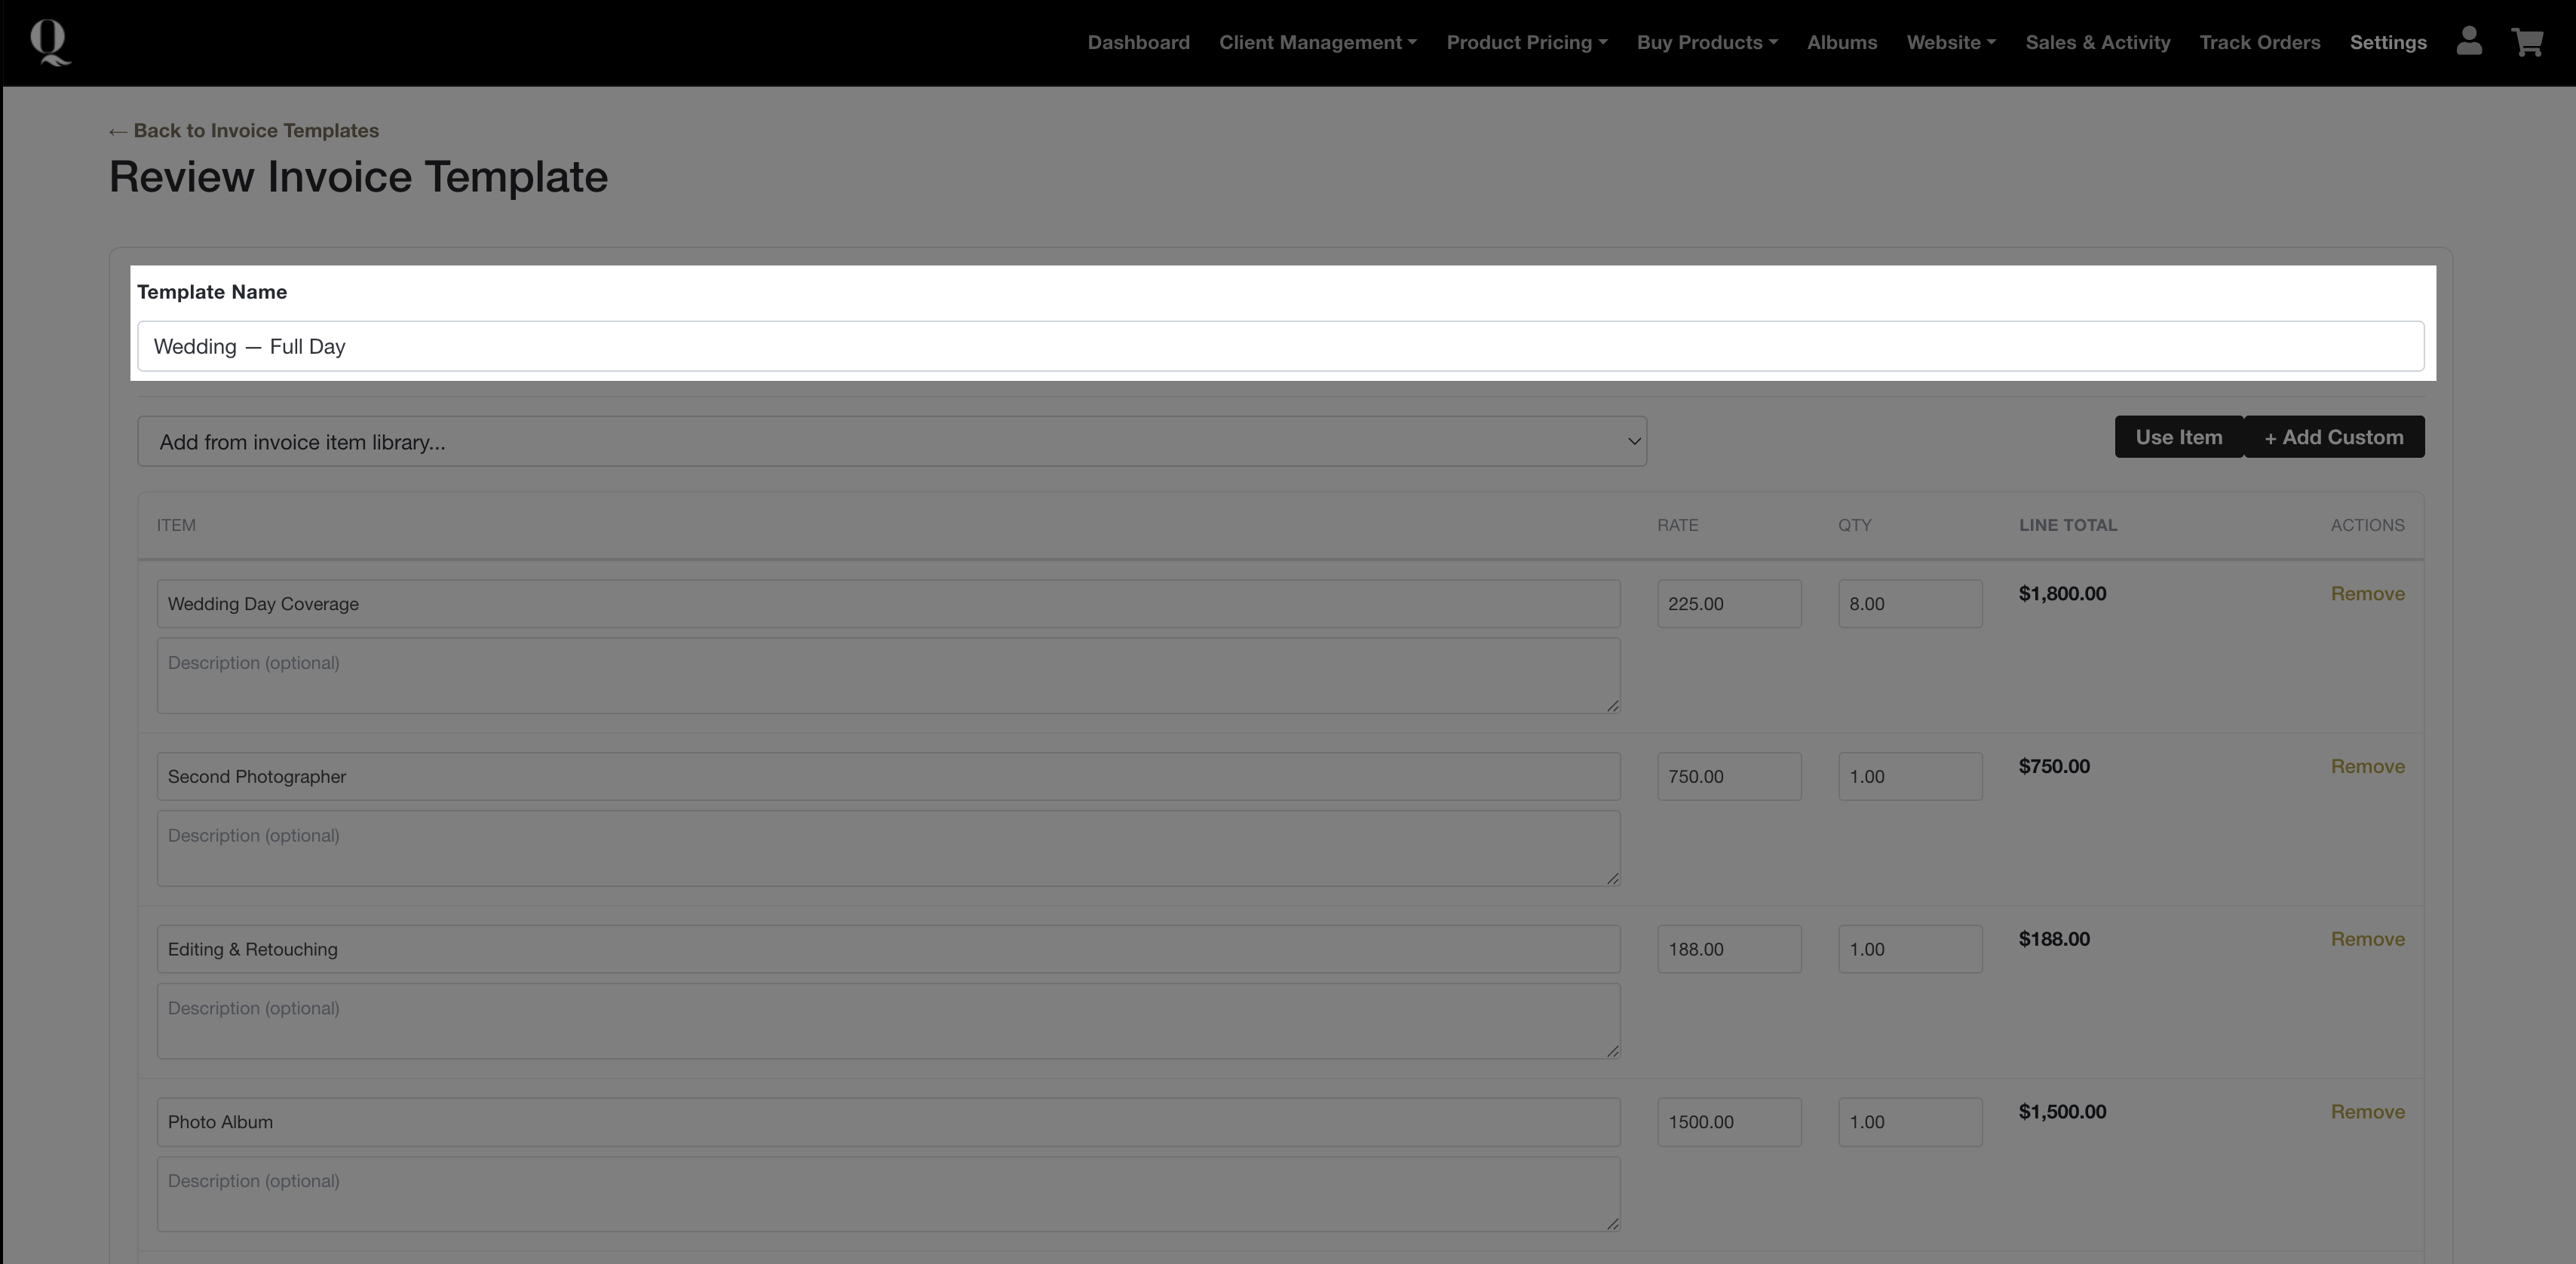
Enter:
● Template Name
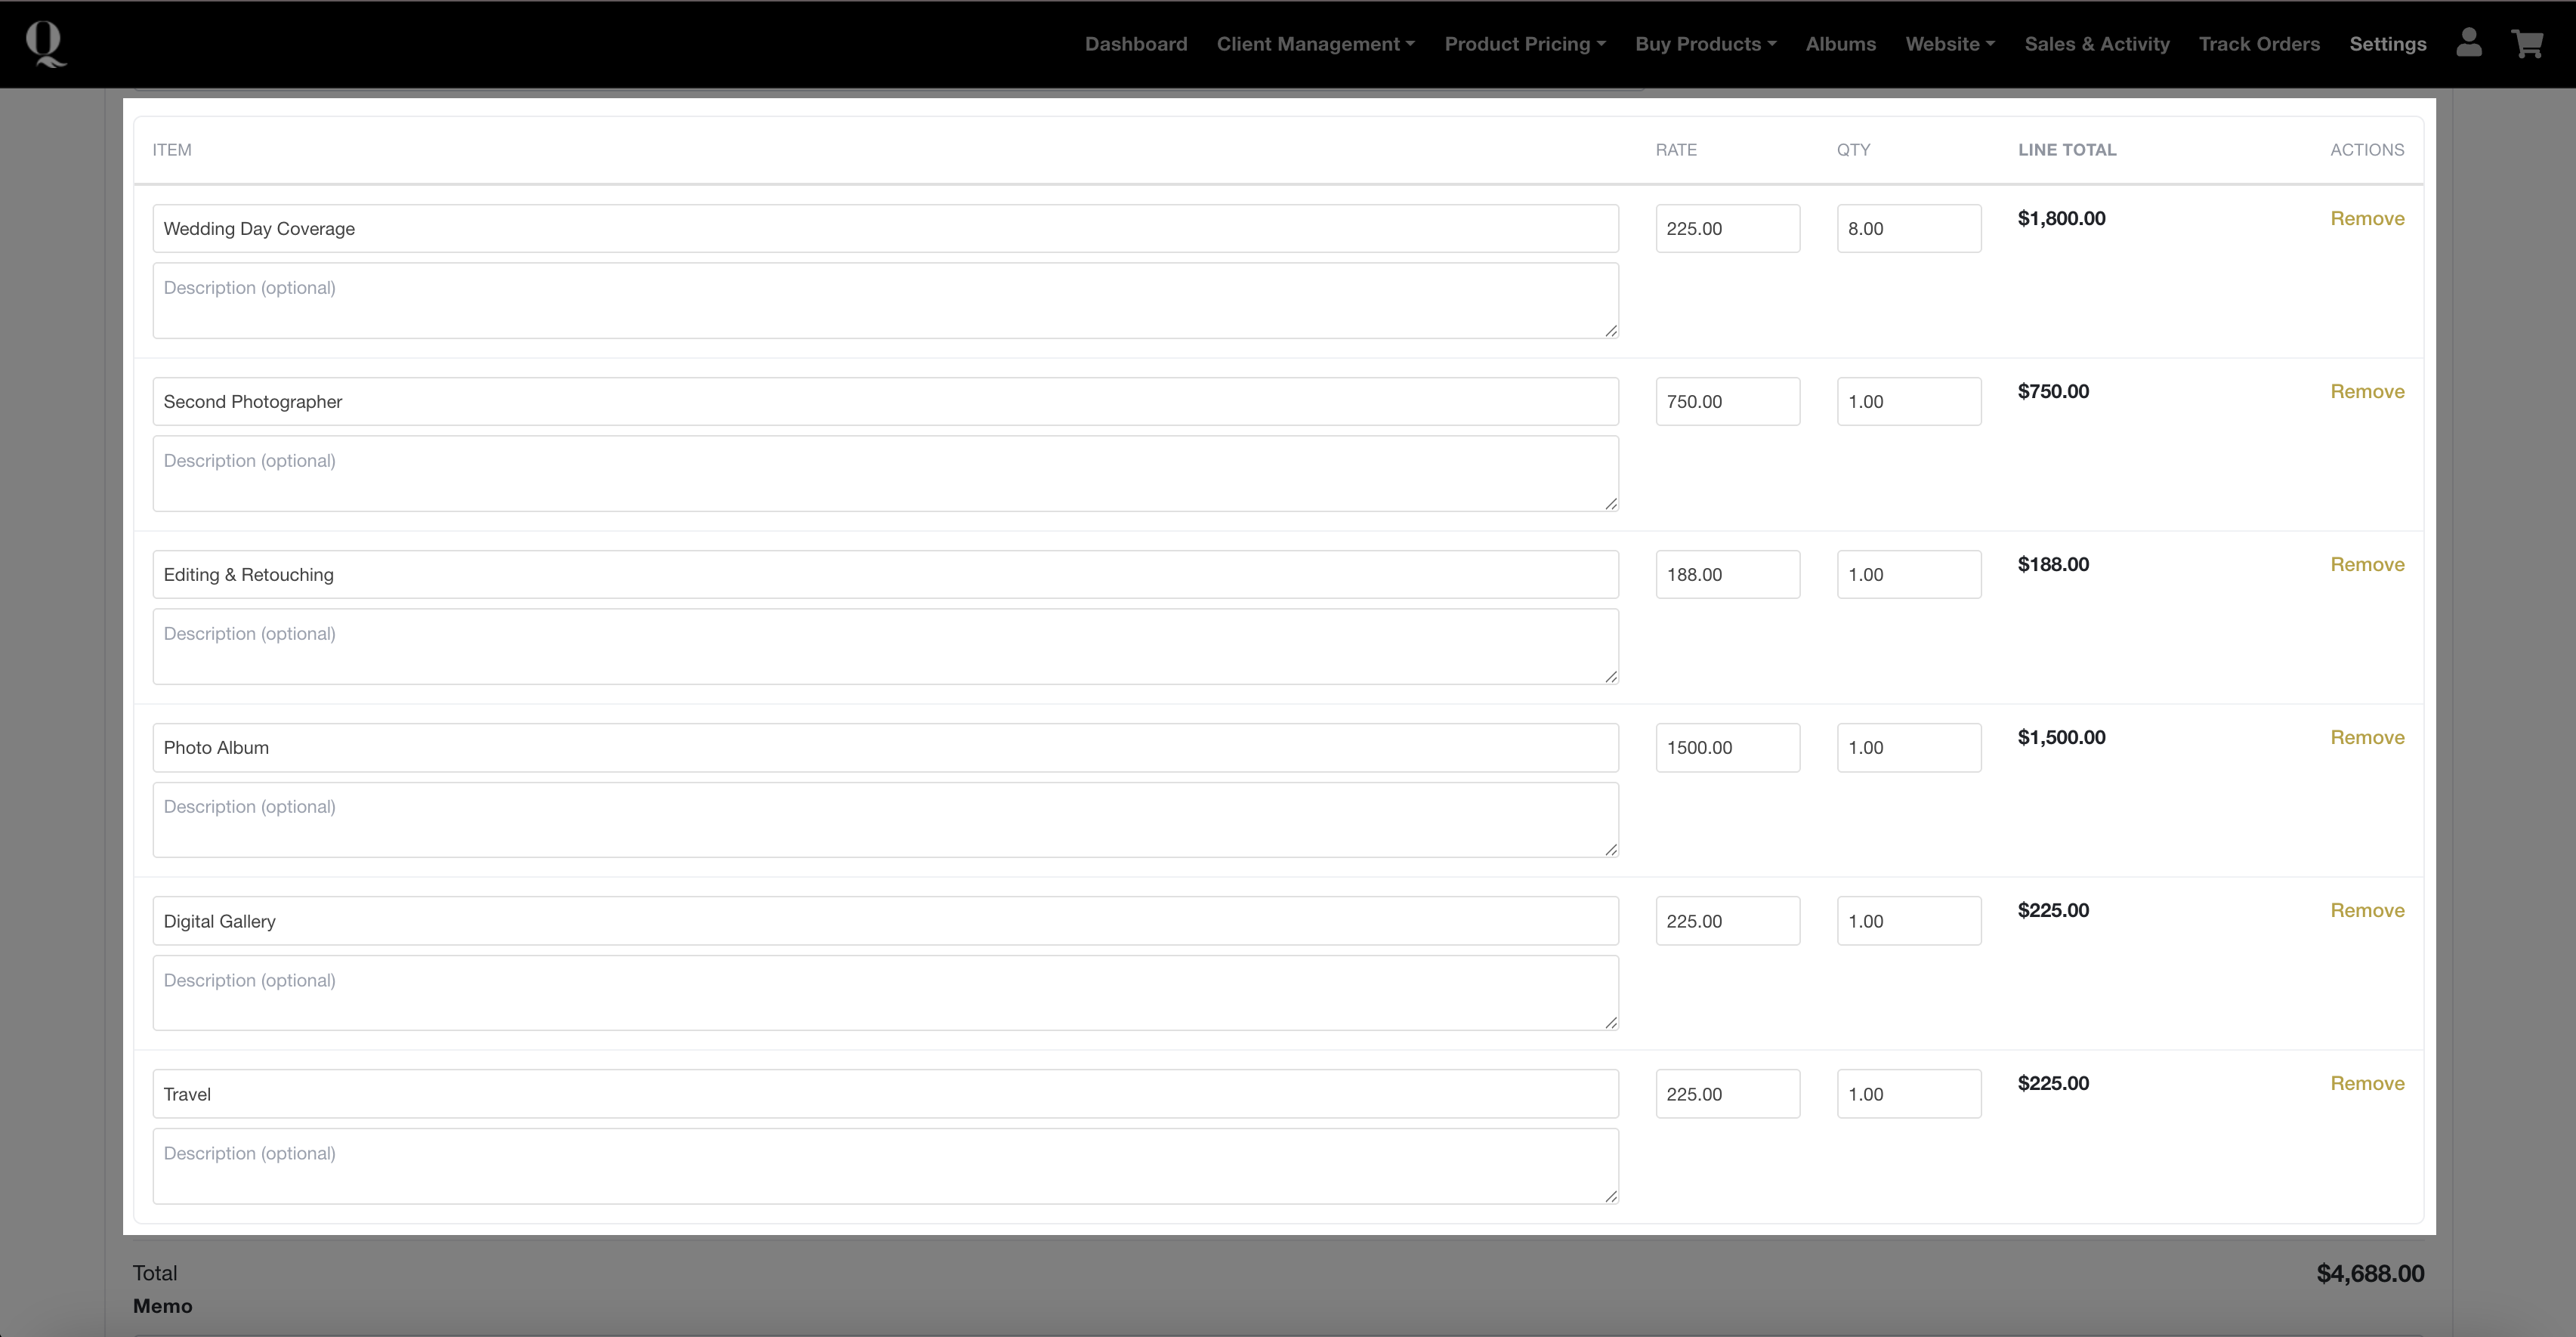
Step 4: Add Invoice Items
For each item, enter:
● Item Name(e.g. Portrait Session)
● Rate(price per item)
● Quantity(e.g. 5 for included digital downloads)
● Description(optional, e.g. 1.5 hour portrait session)
Step 5: Add Discounts (Optional)
● Set a discount amount if required
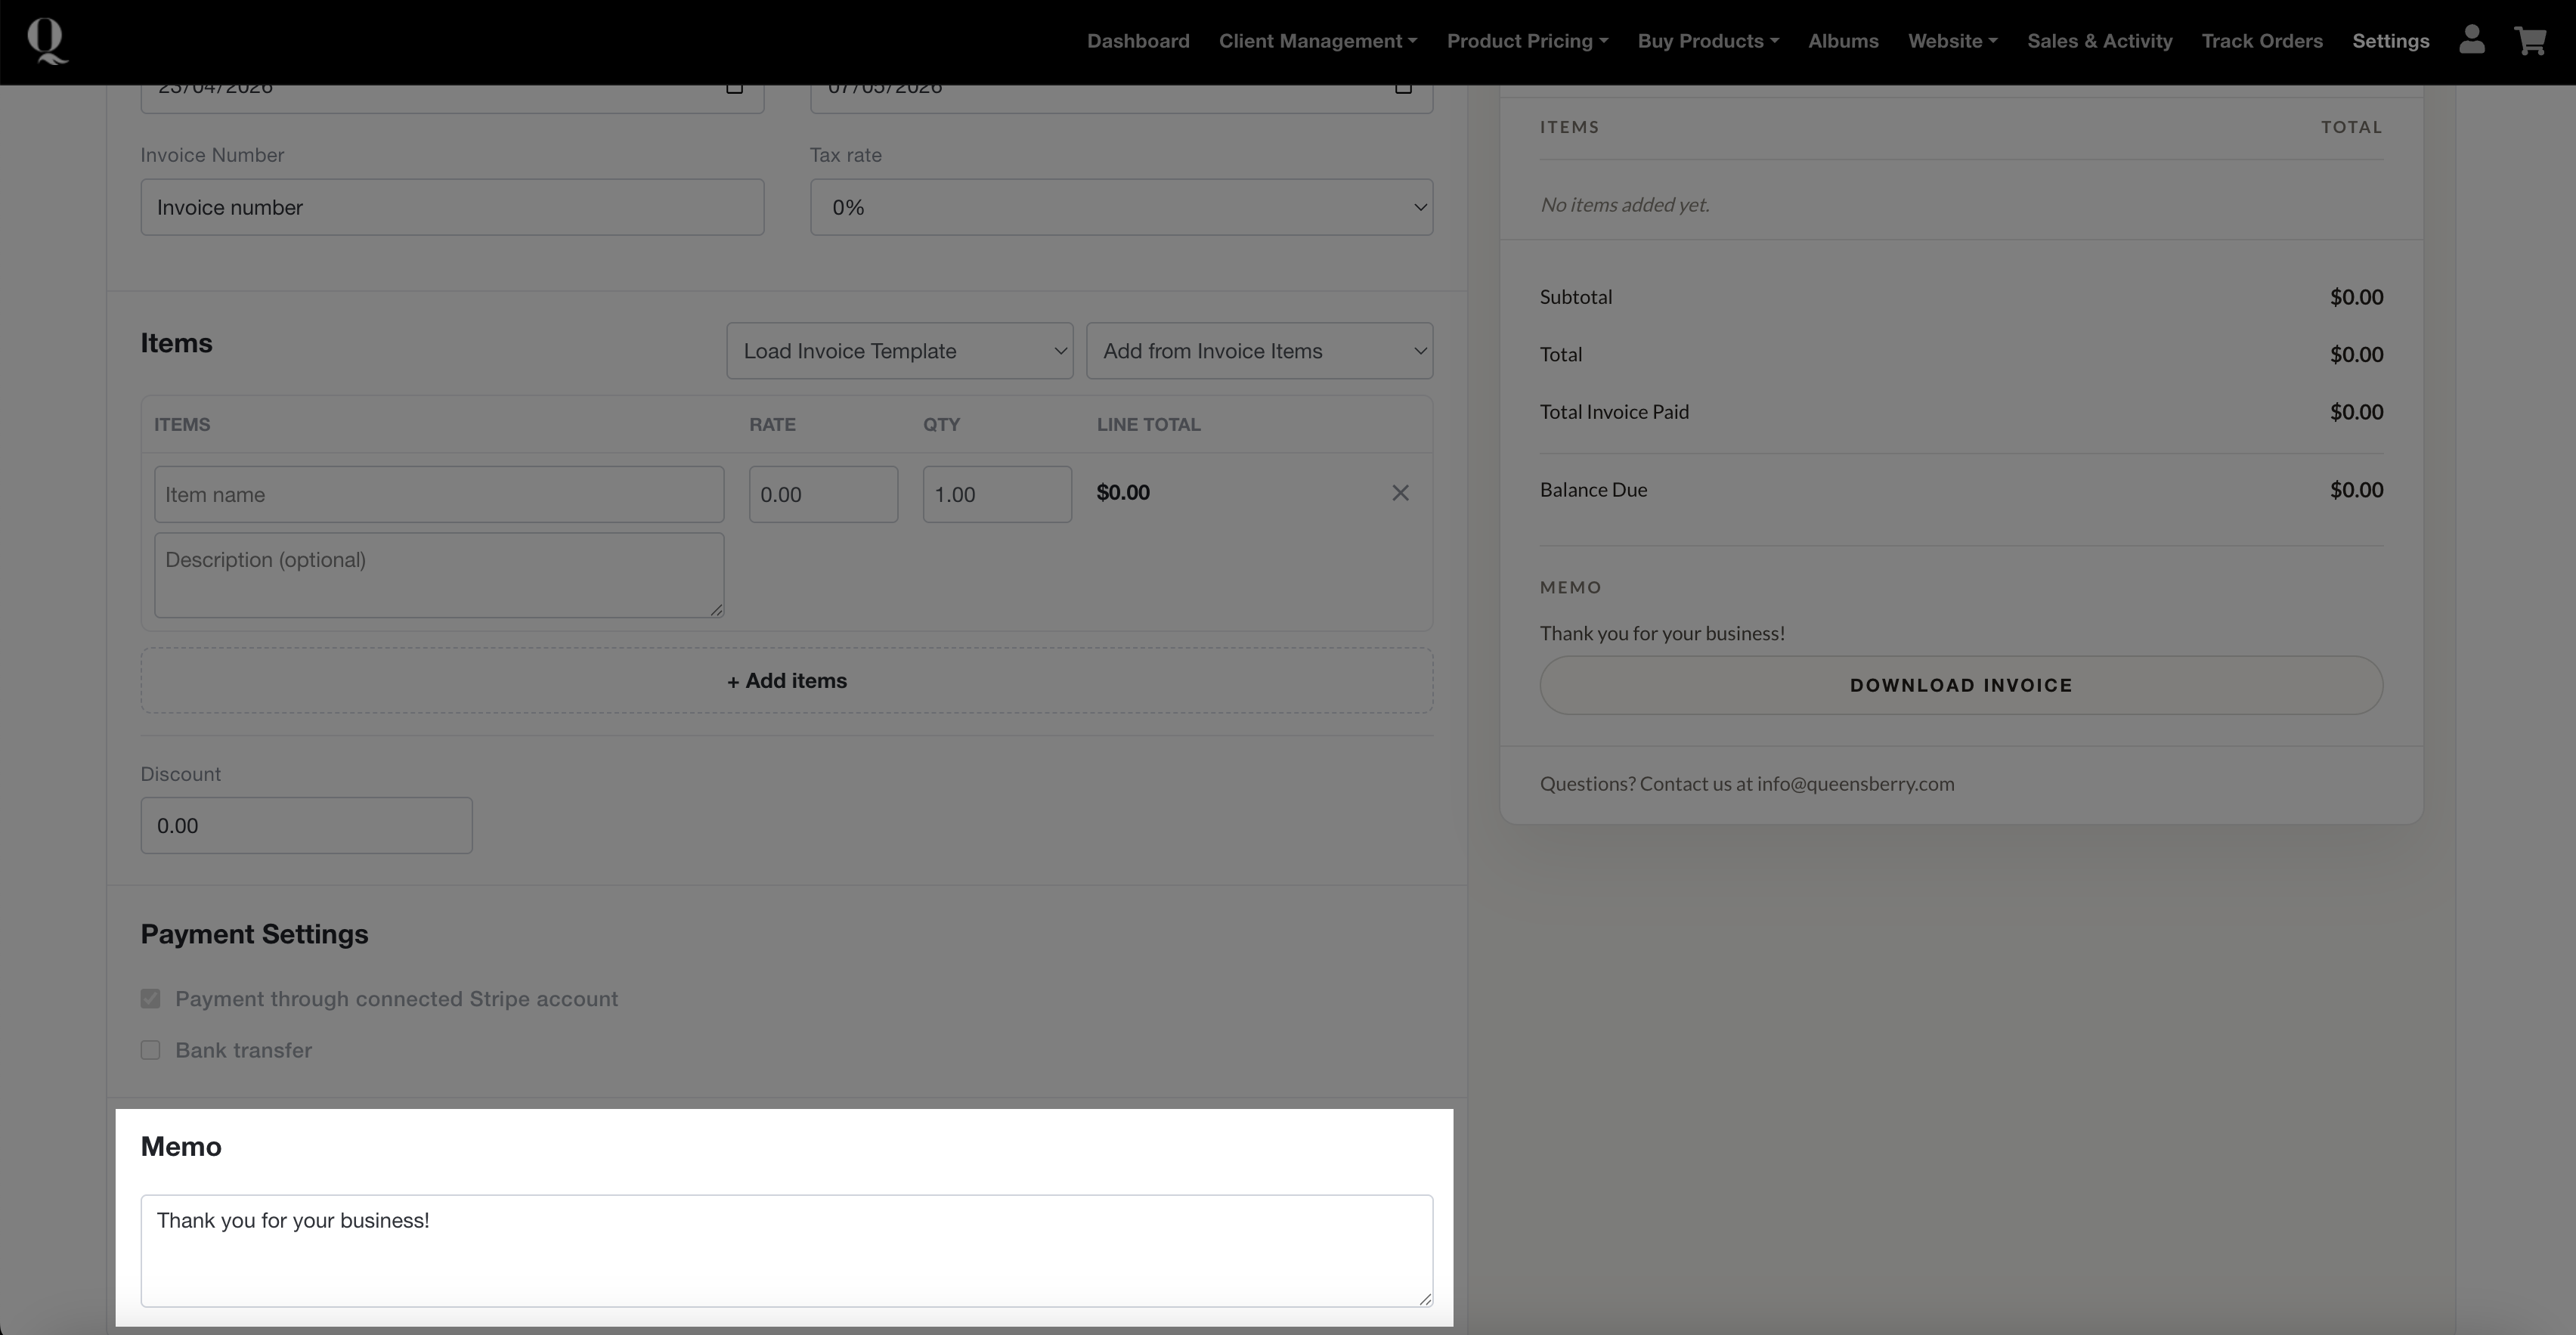
Step 6: Add a Memo
Include a message for your client (e.g. a thank you note or payment details).
Step 7: Enable Your Template
- Click Enable invoice template
Creating a Custom Invoice
Custom invoices are best for one-off jobs or when details vary per client.
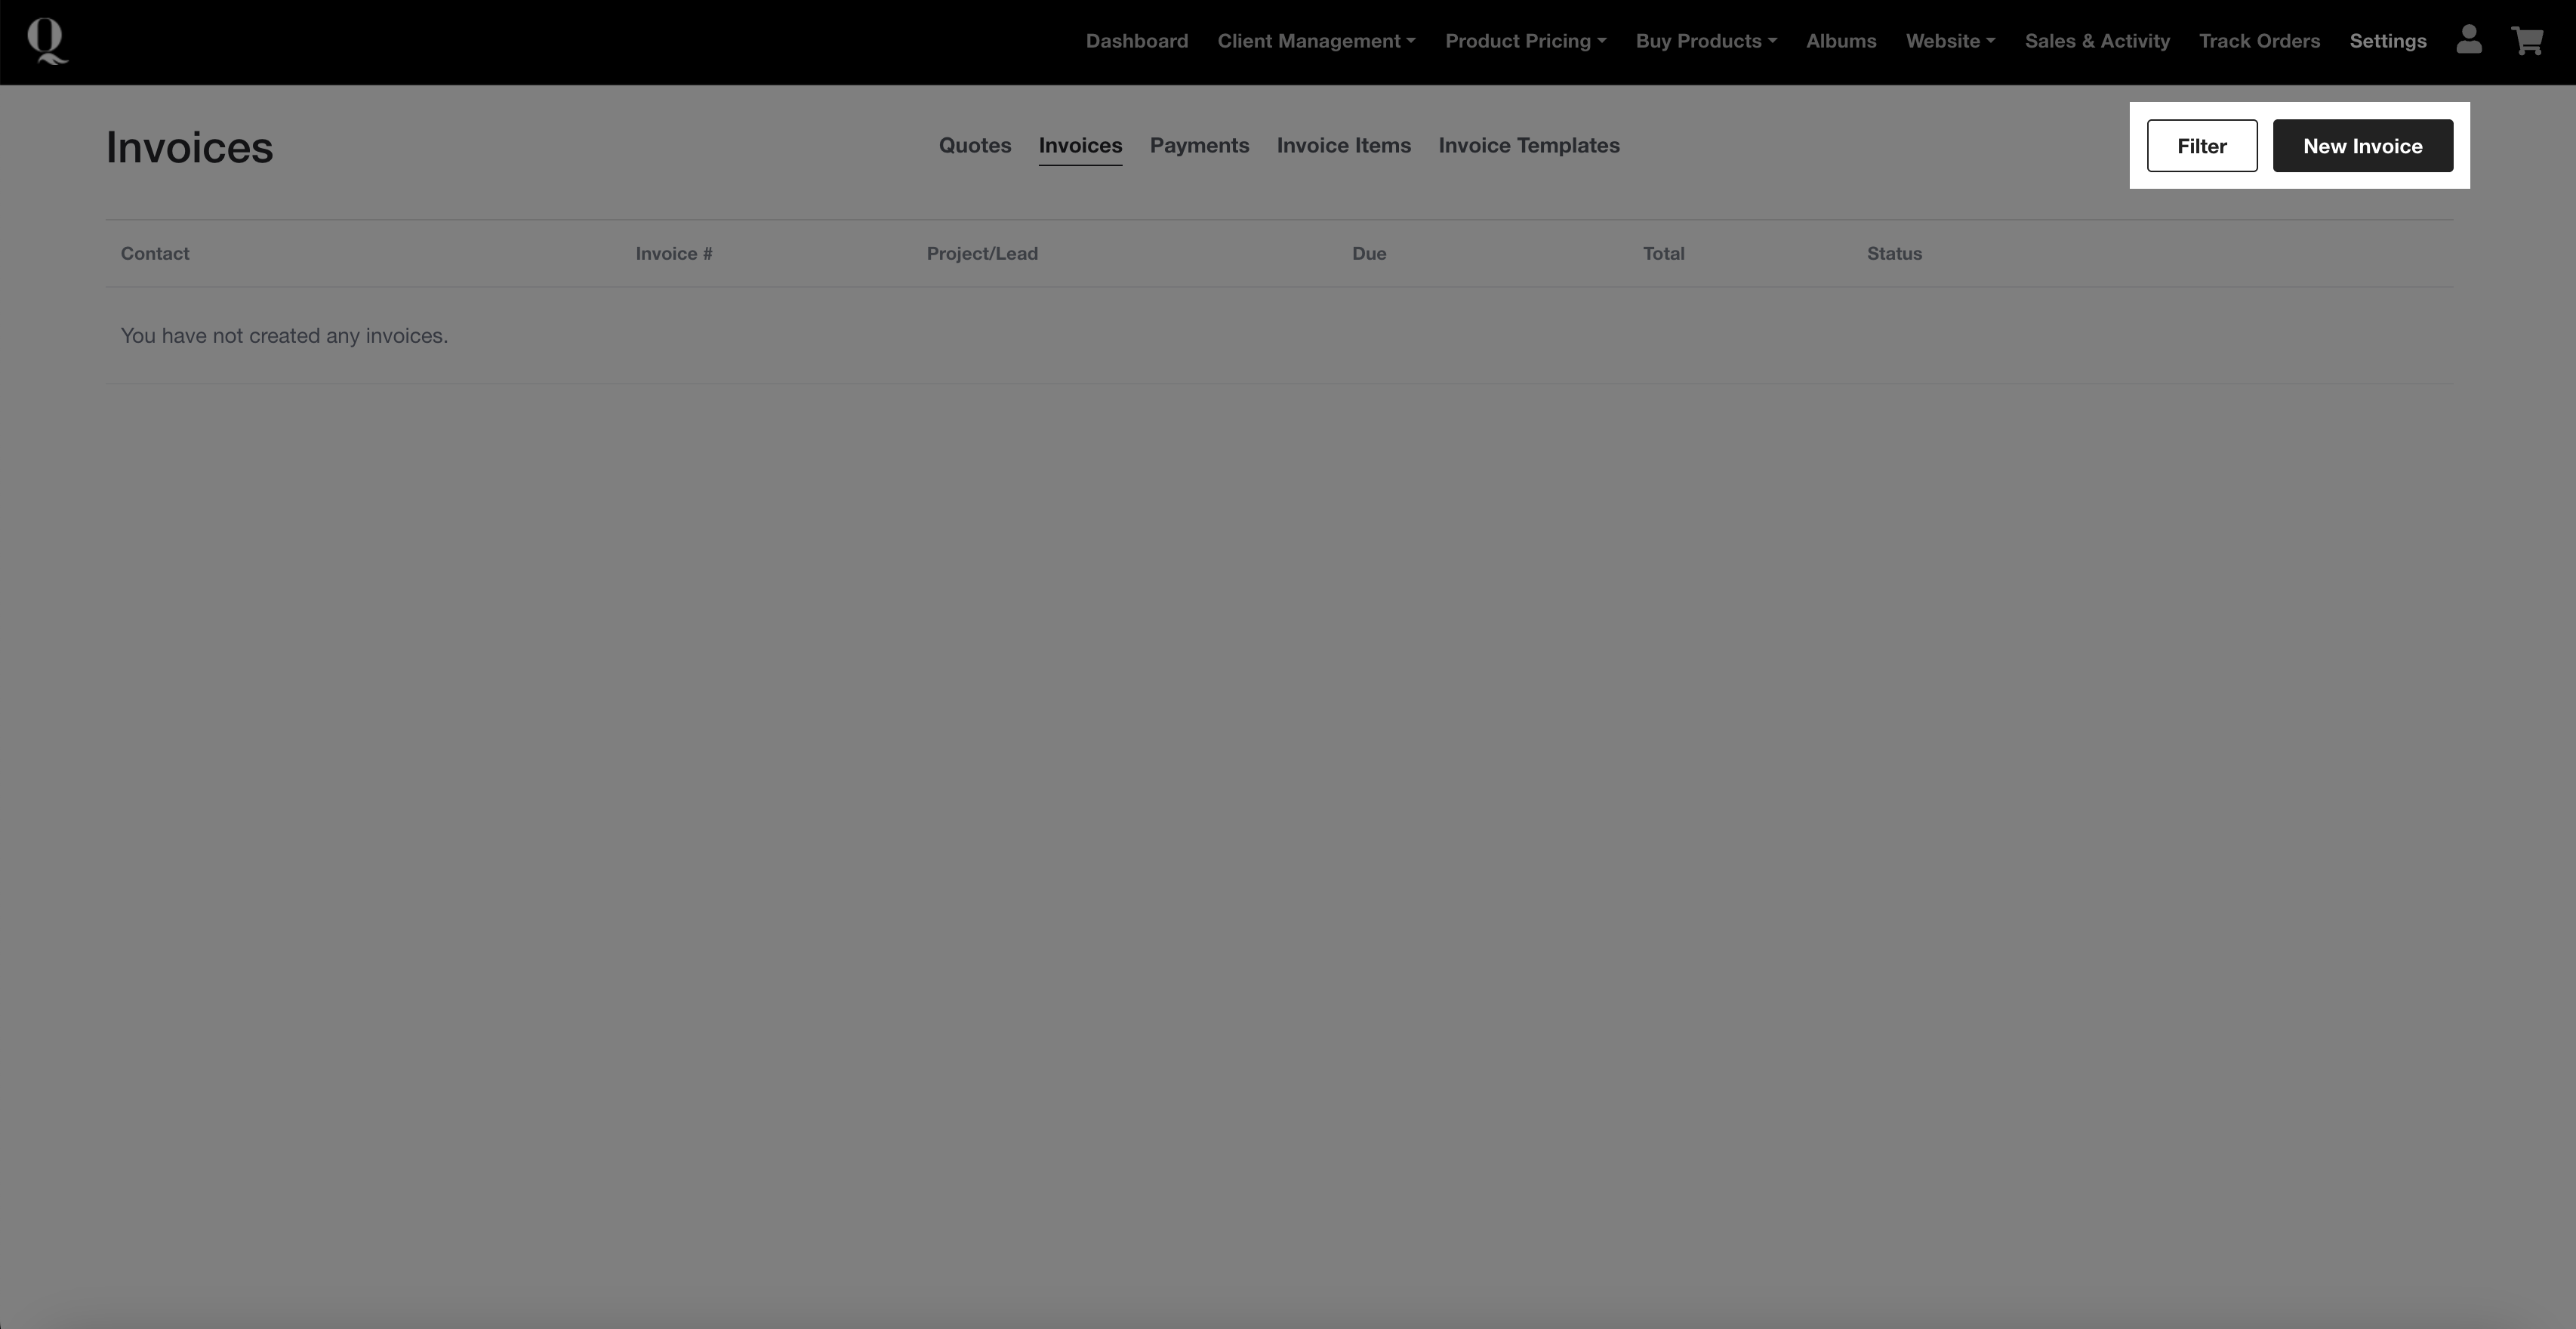
Step 1: Start a New Invoice
● In Invoicing, click to create a new invoice
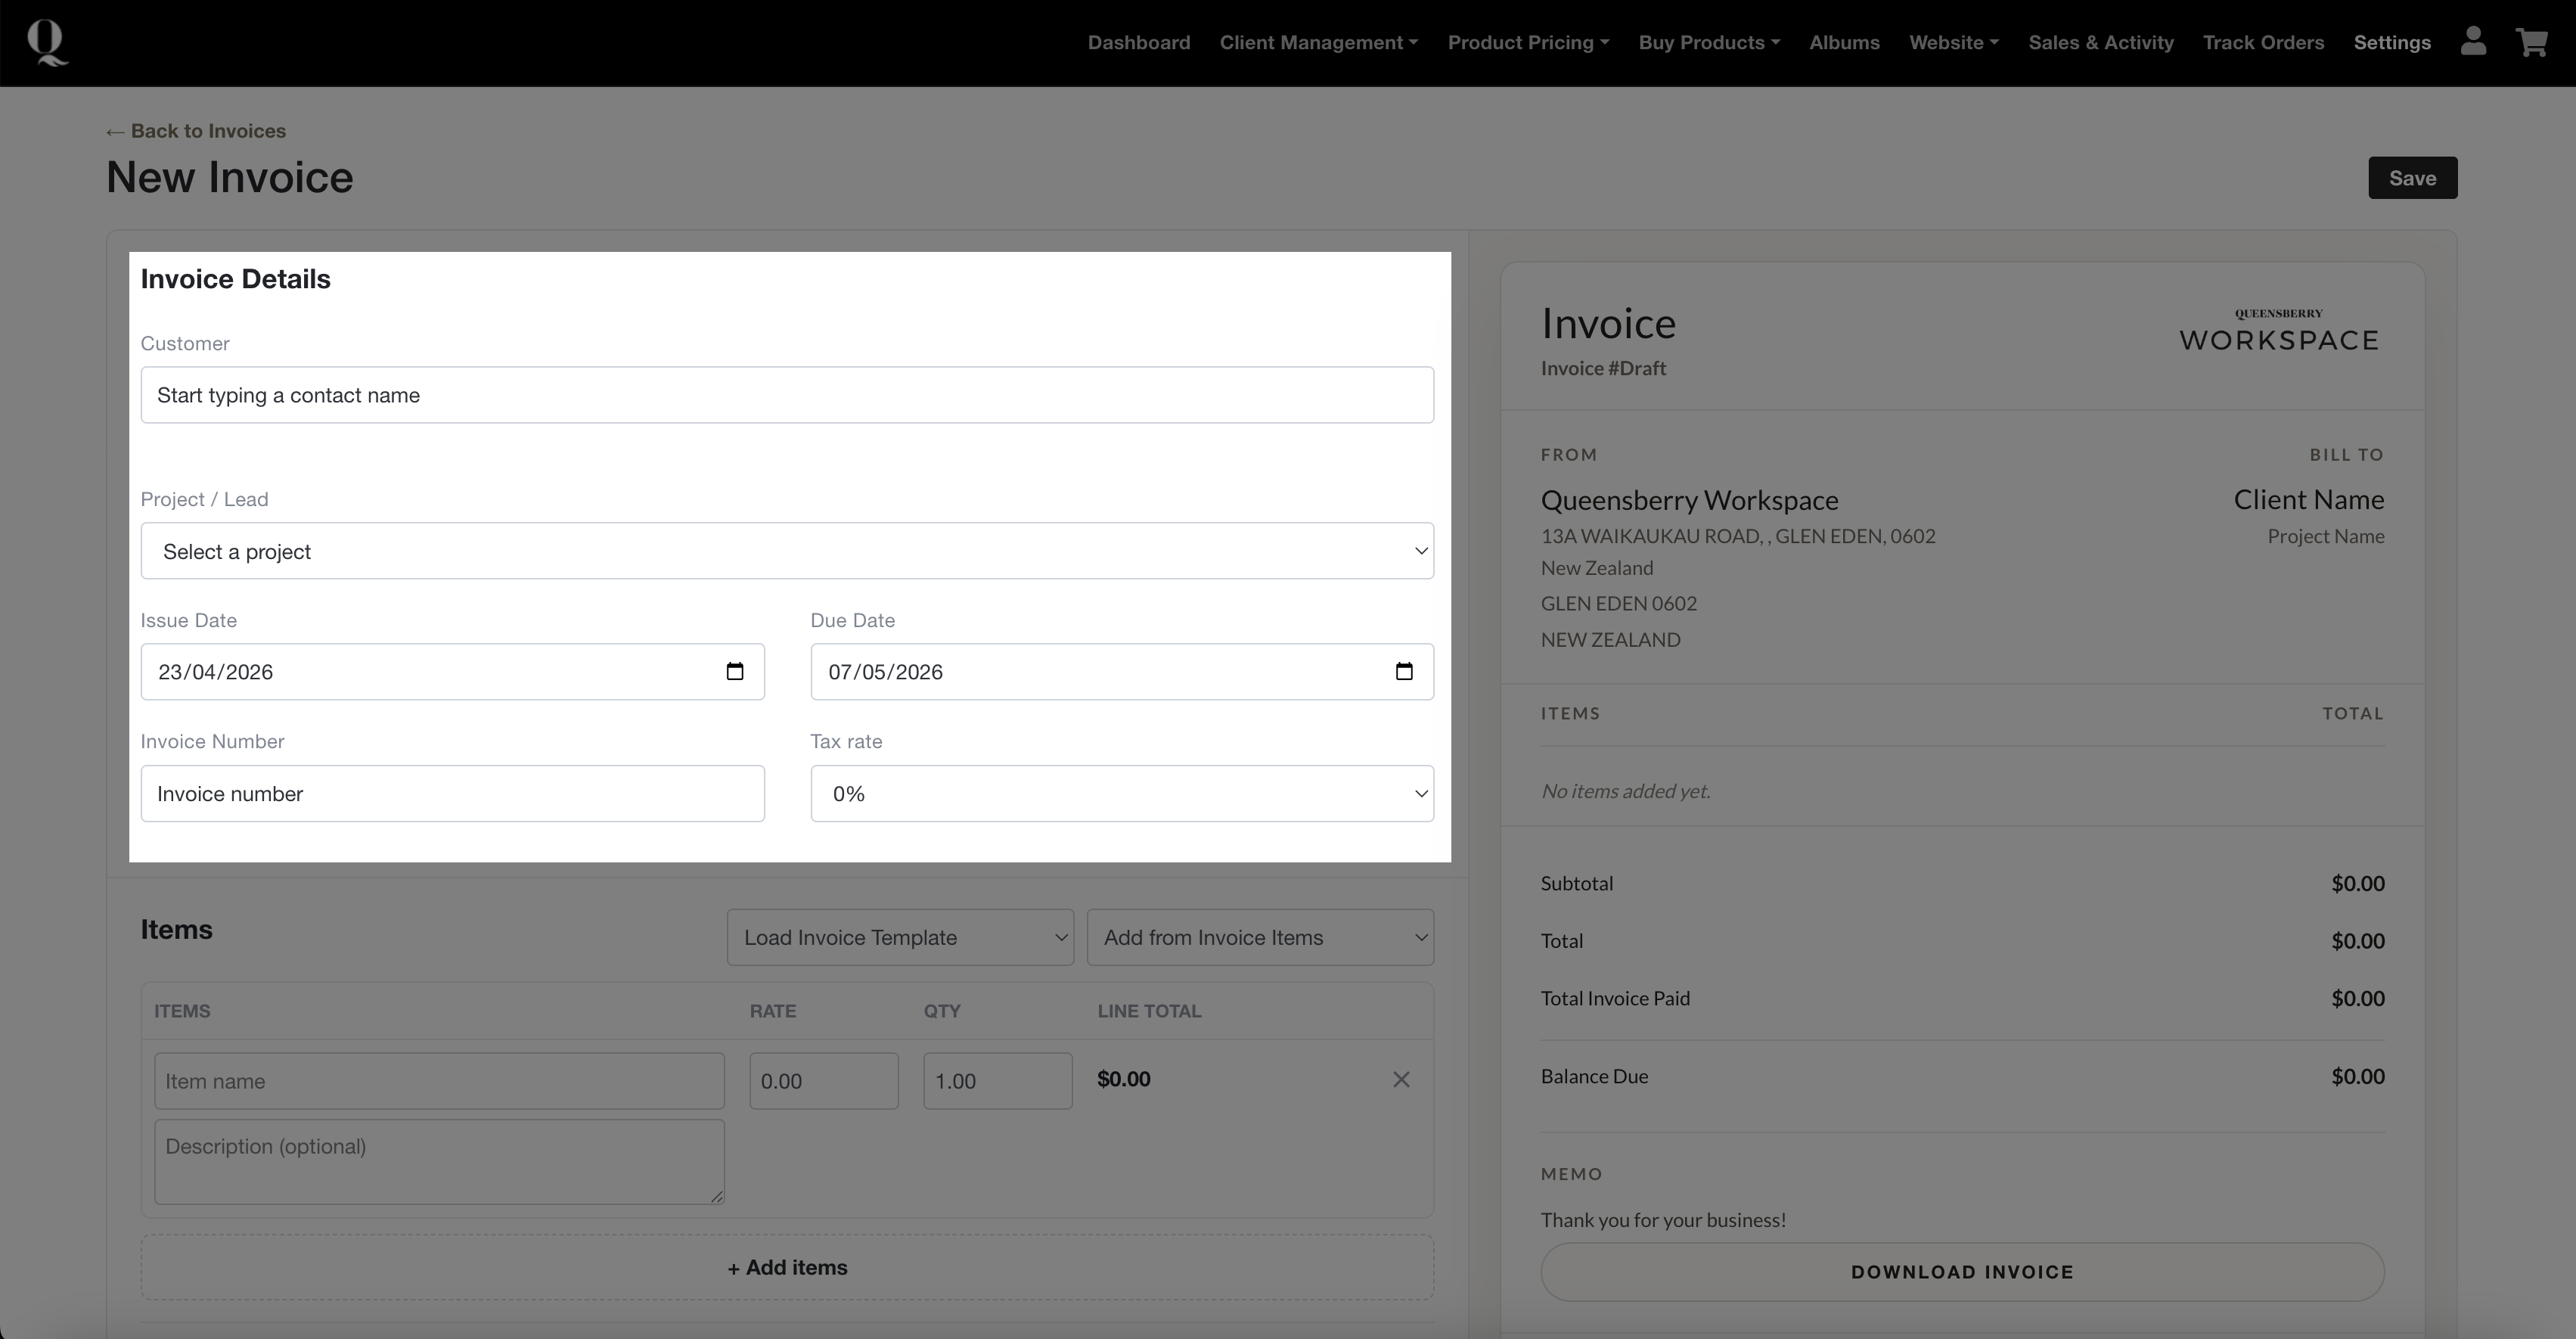
Step 2: Enter Invoice Details
Enter:
● Customer Name
● Project / Lead(e.g. Hagen Family Portraits)
● Issue Date
● Due Date
● Invoice Number (you will need to enter your tax number to charge tax)
● Tax Rate (you will need to enter your tax number to charge tax)
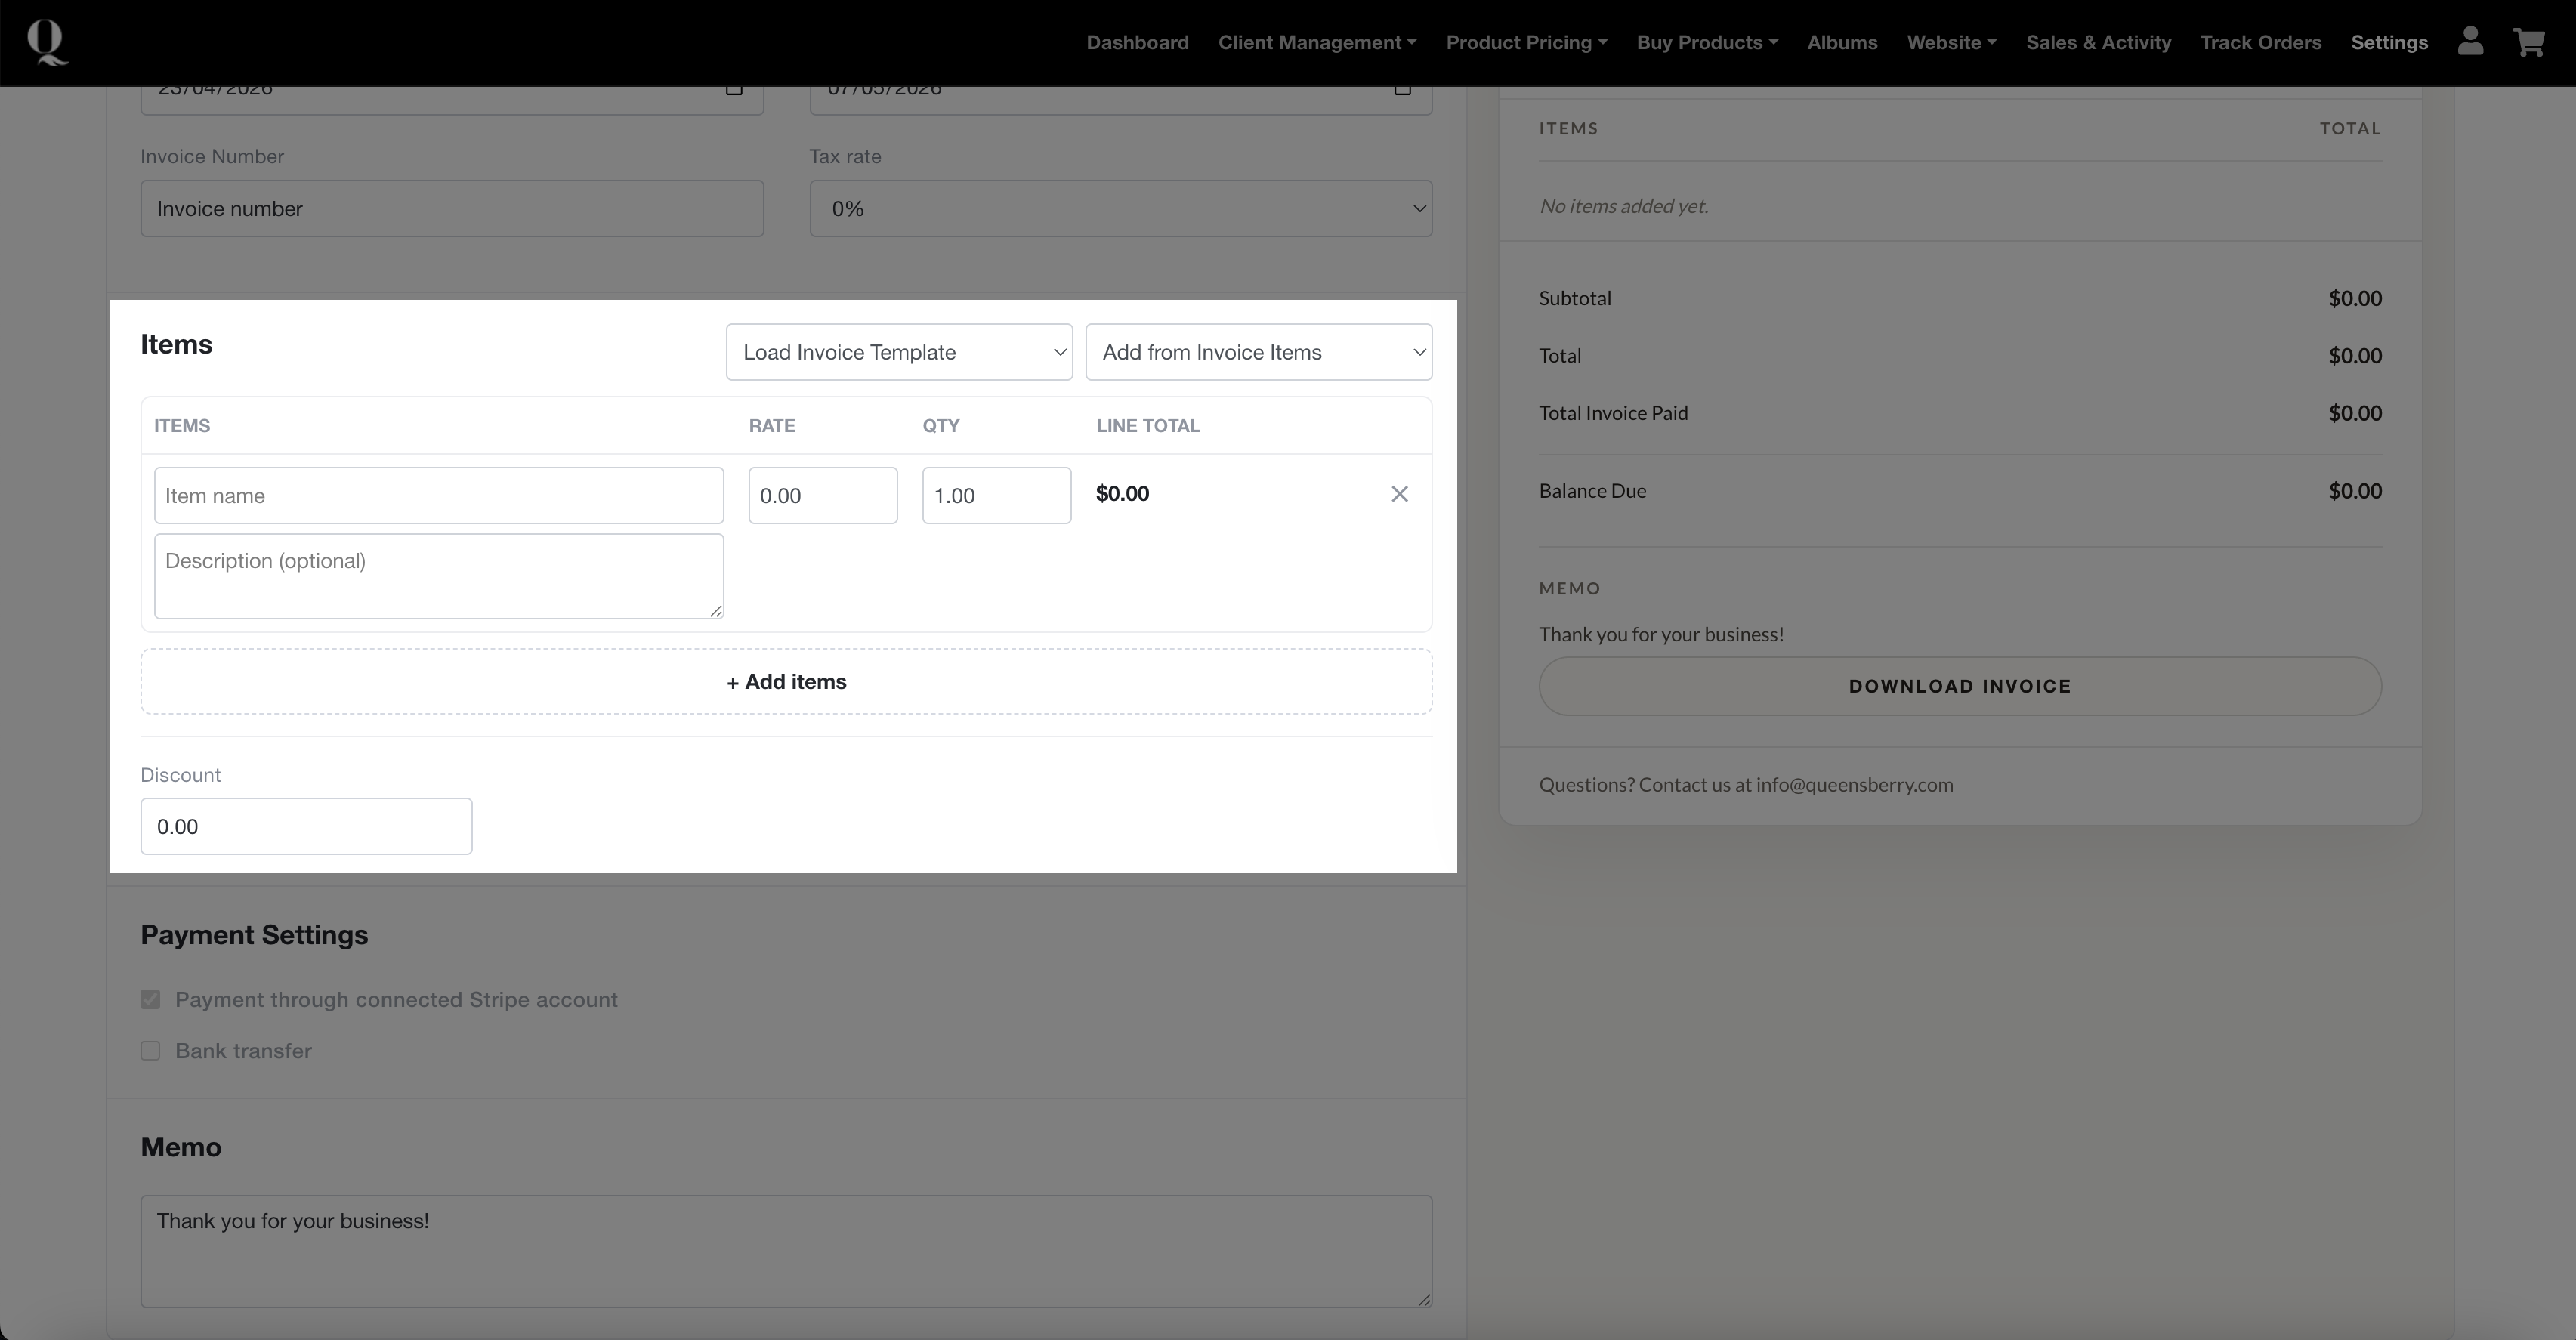
Step 3: Add Invoice Line Items
For each item, enter:
● Item Name
● Rate
● Quantity
● Description(optional)
Note: Click New Invoice Template to access Workspace's editable line item templates, or to create and save your own (e.g. for session fees, wedding coverages, second photographer).
Step 4: Apply Discounts (Optional)
● Add a discount amount if needed
Step 5: Select Payment Settings
Choose how your client can pay:
● Stripe
● Bank Transfer
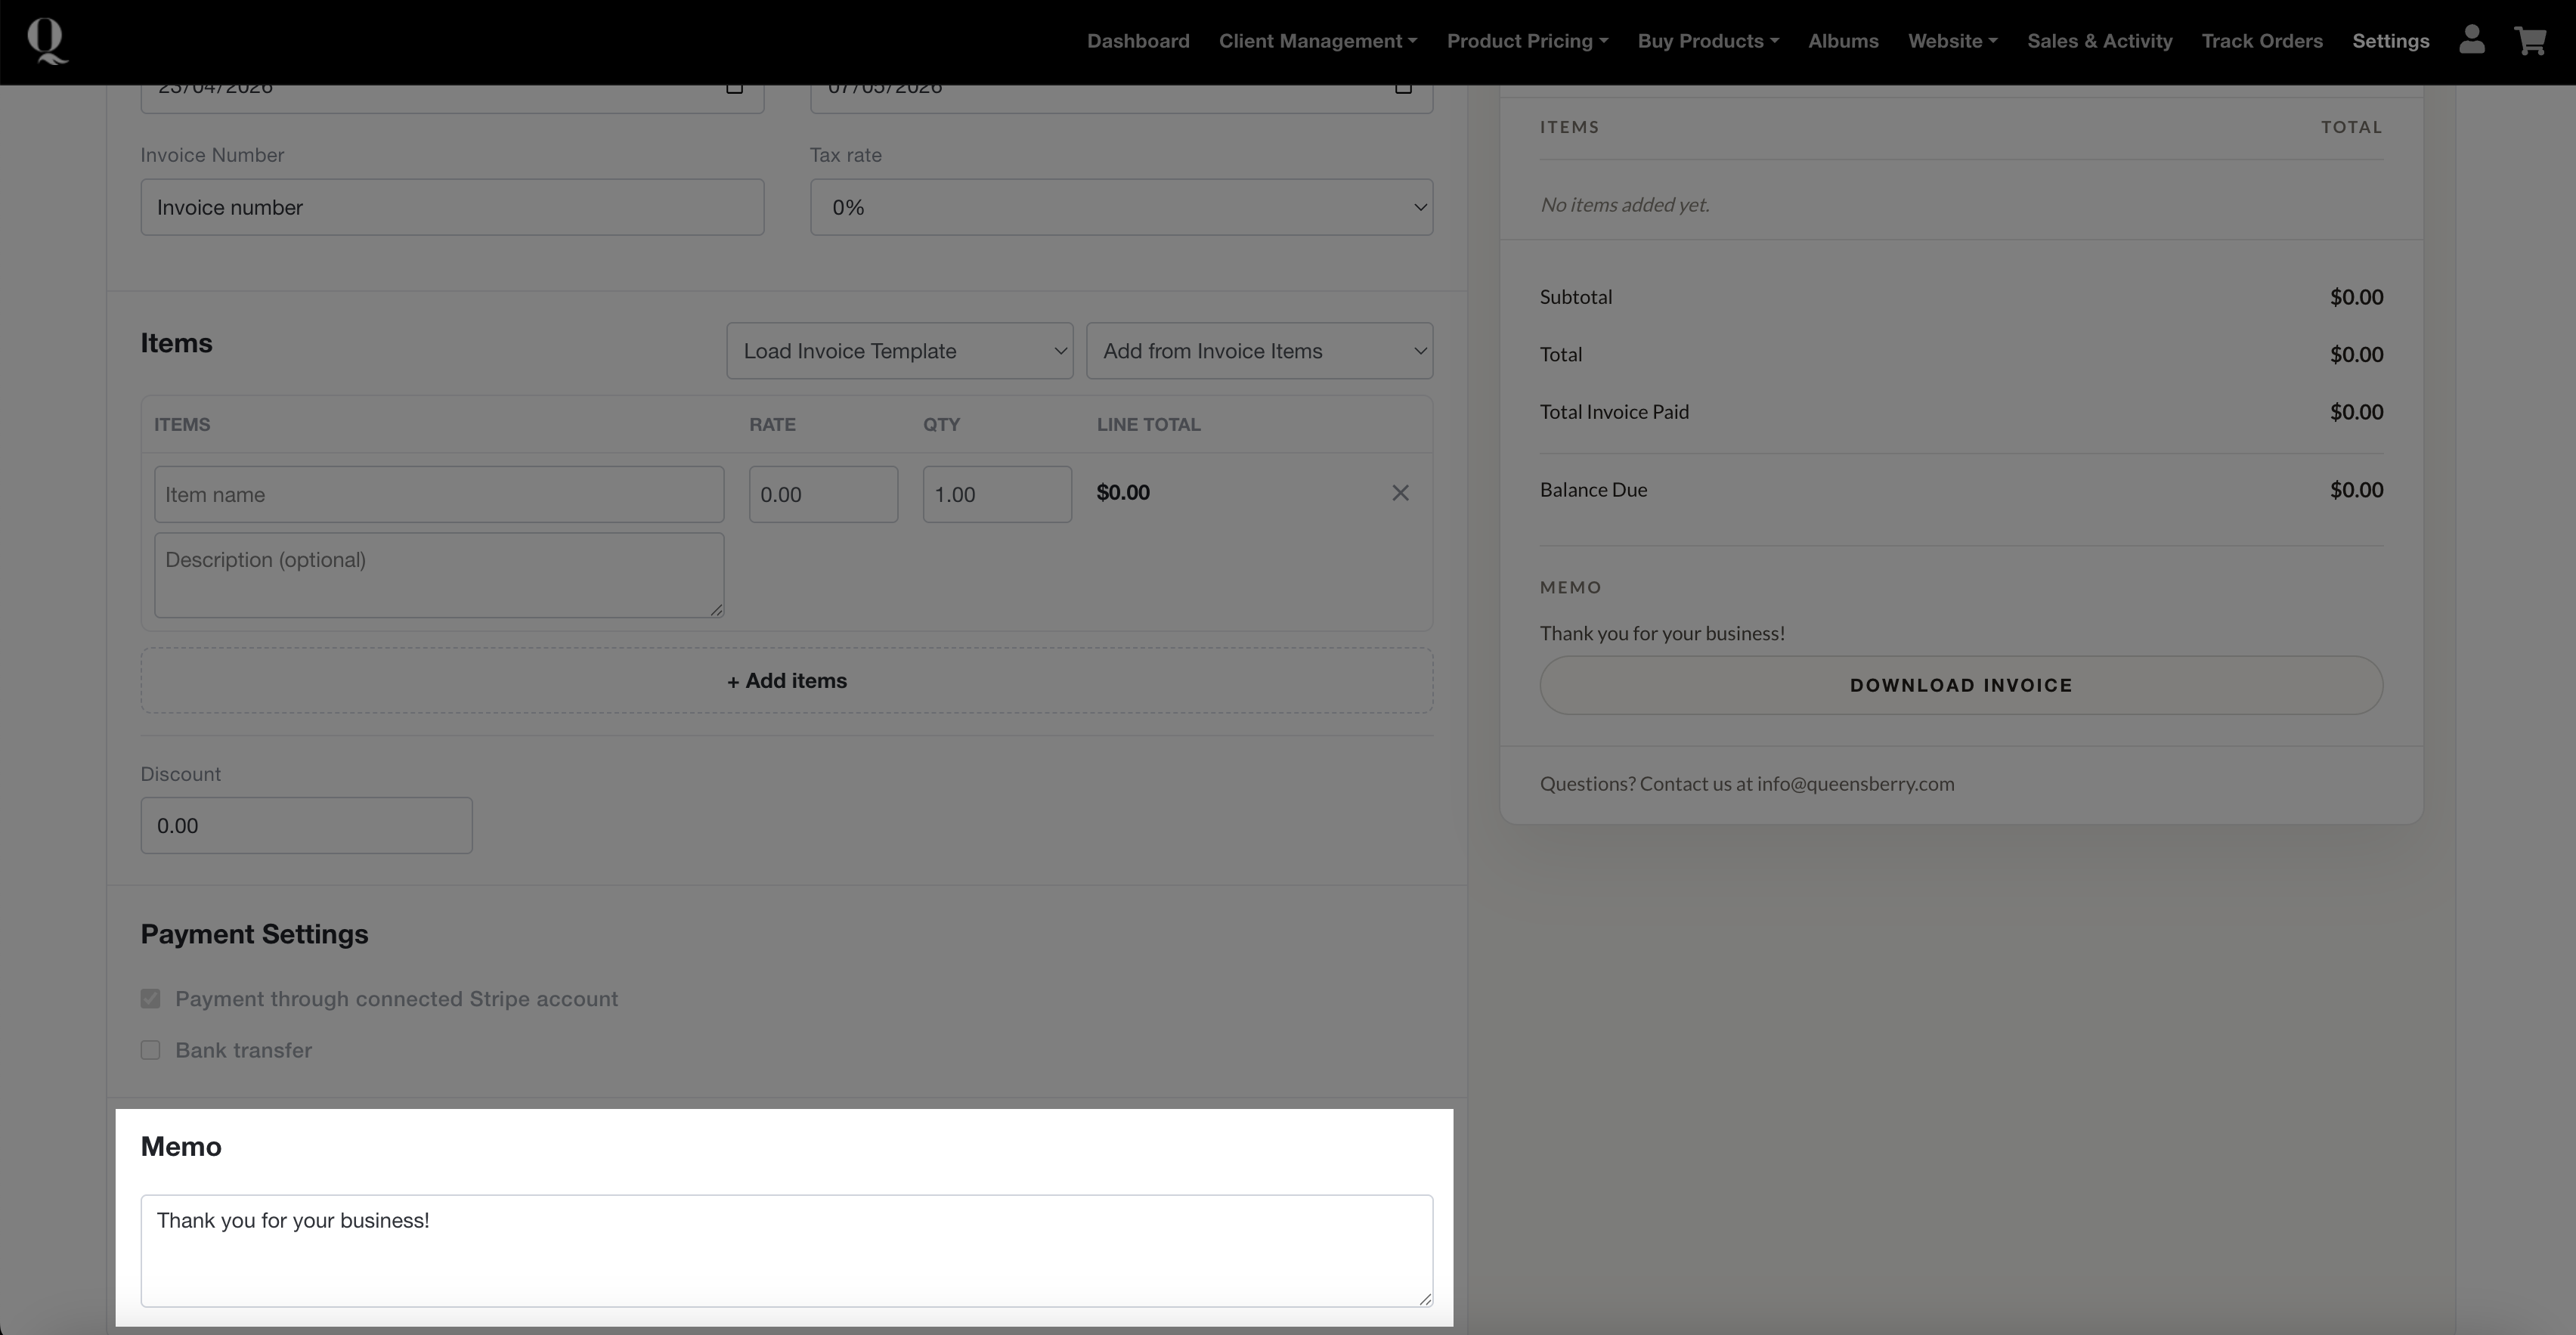
Step 6: Add a Memo
Include any notes for your client (e.g. a thank you message or payment instructions).
Step 7: Send the Invoice
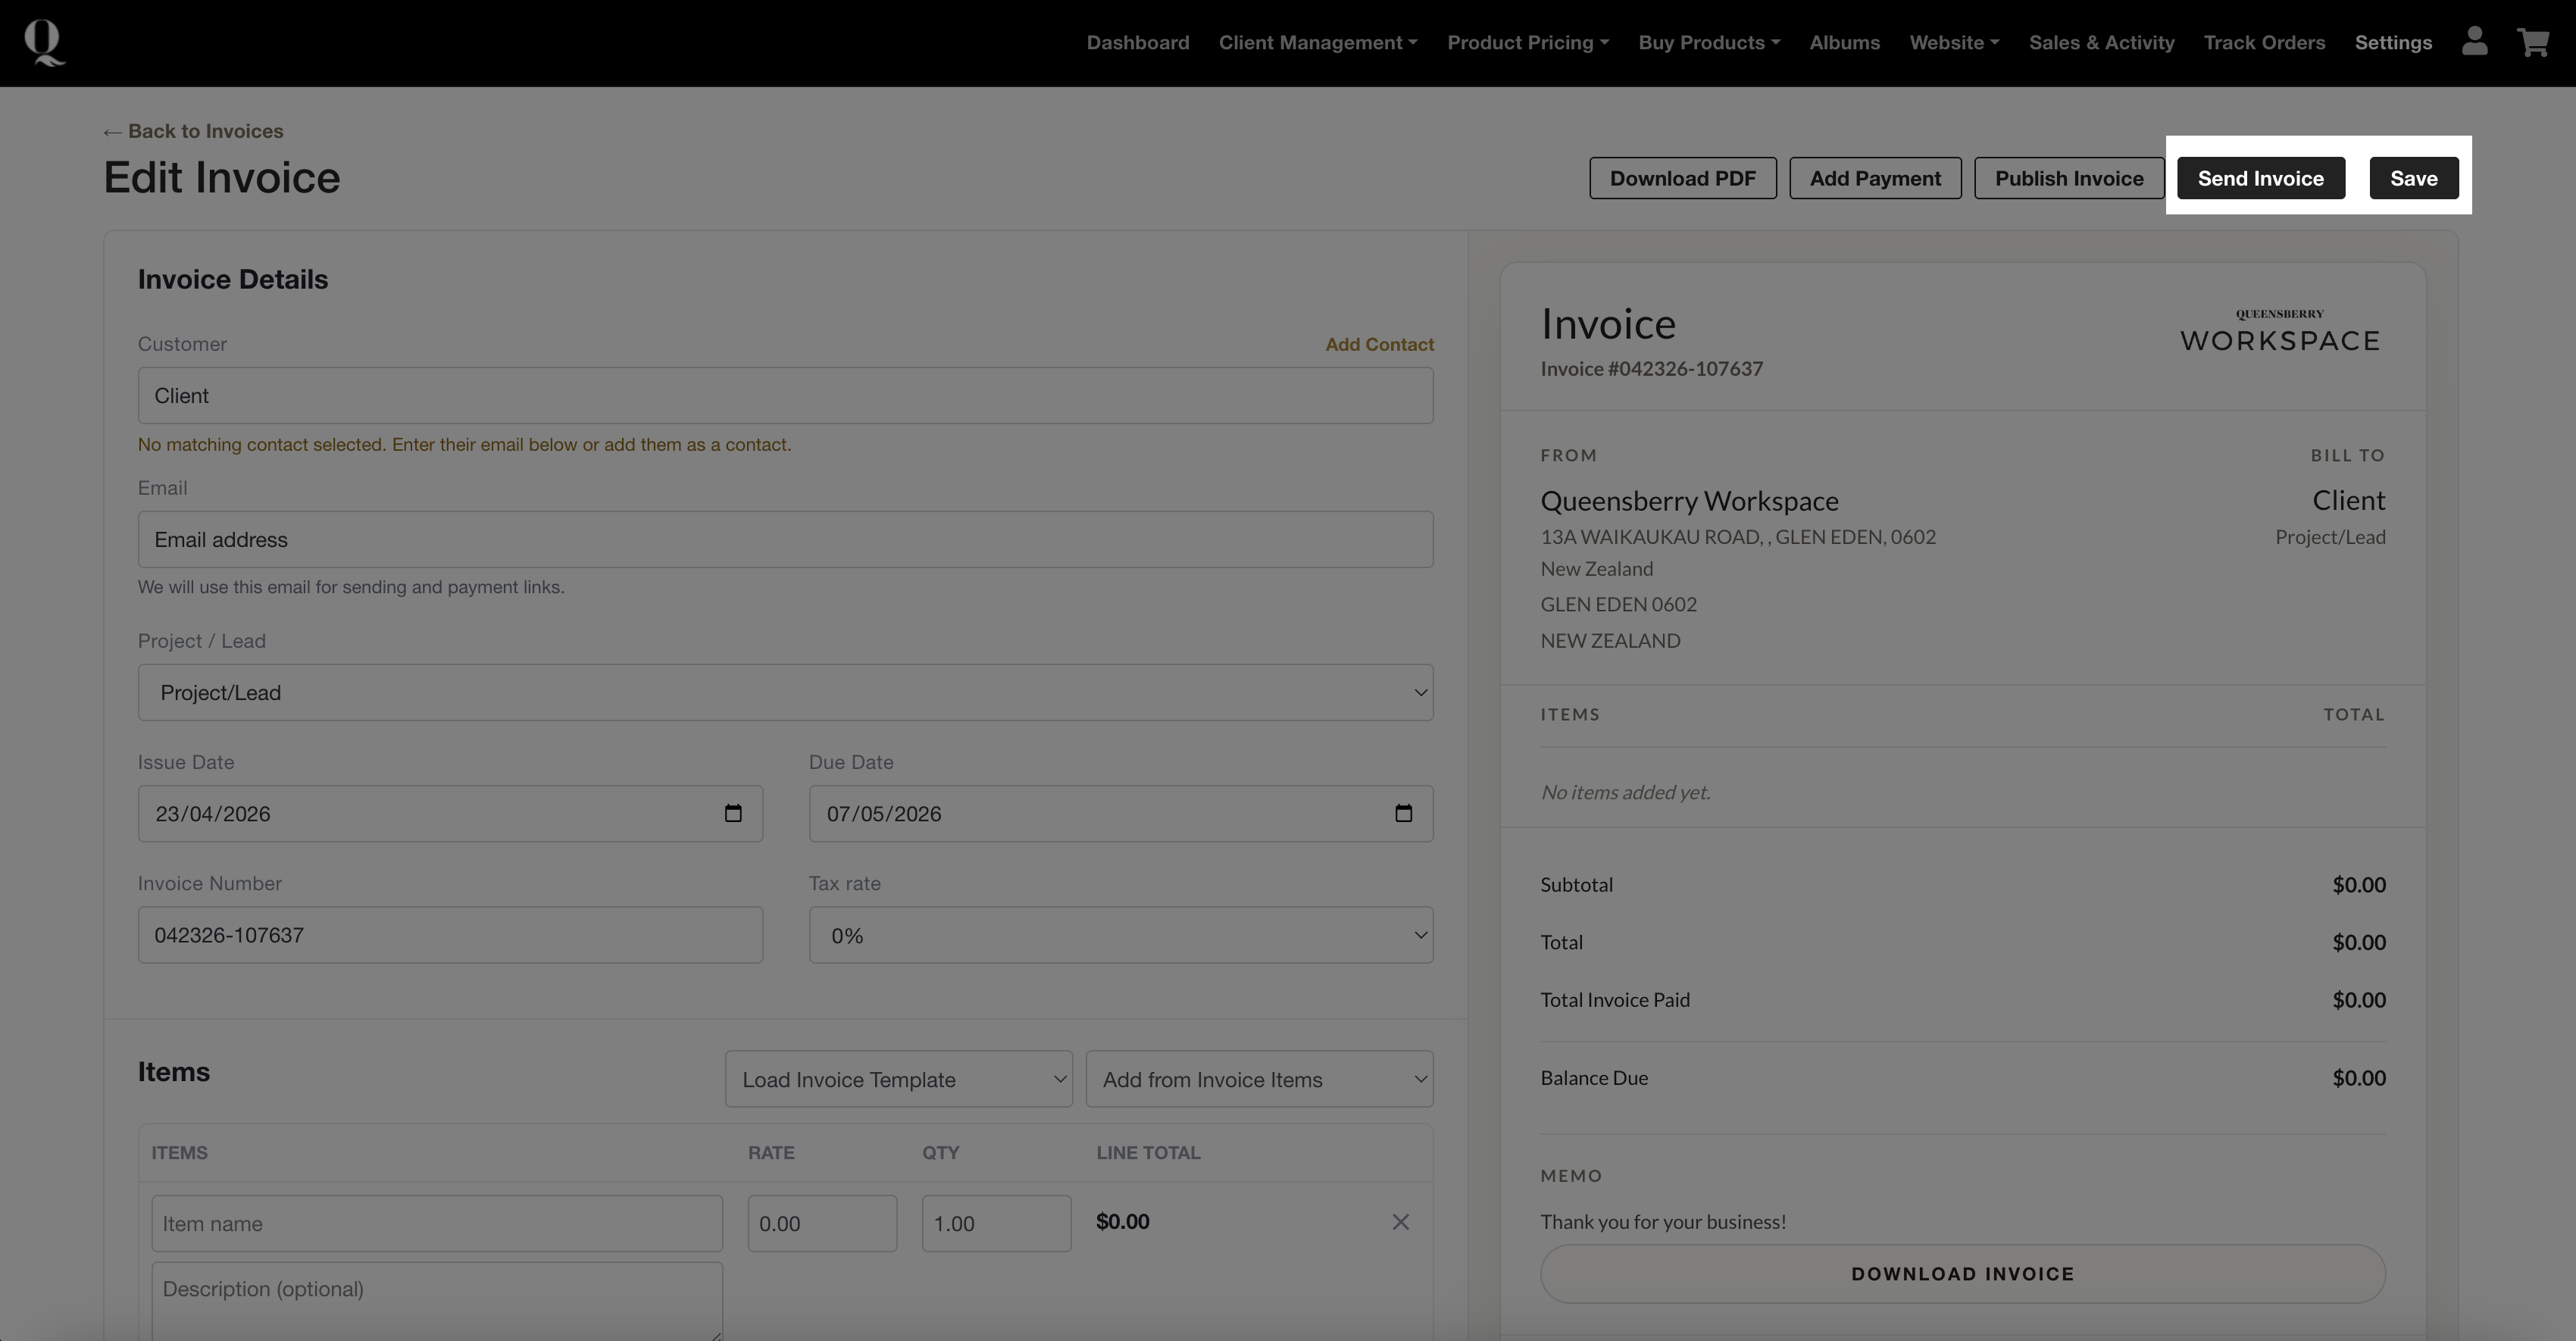
- Click Save and then Send invoice.
- Enter:
- Client Email Address
- Email Subject
- Email Message
Confirm to send the invoice.
Tips
● Use templates for your most common services to save time.
● Keep item descriptions clear so clients understand what they’re paying for
● Set clear due dates to improve payment turnaround.
Pro Tips
Use invoice templates alongside your Self-Booking Packages and Workflows to create a smooth, automated client experience—from booking through to payment.
Use the separate Workspace Galleries price list and shopping cart module for your online wedding, portrait, school and print shop sales.


