
Forms in Workspace are designed to support three key parts of your workflow: capturing leads, growing your mailing list, and collecting information from clients.
Lead Forms
When a form is set as a Lead Form, each submission automatically creates a new lead in Workspace. This allows you to track and manage enquiries from the moment they come in. AS an option you can include a mailing list opt-in checkbox. By default submissions won't be added to your mailing list unless the user o opts in.
Mailing List Forms
Forms can also be set up specifically to grow your mailing list, in which case submissions are added directly to your mailing list.
You can enable double opt-in as an extra layer of confirmation. If you’re using a form for this purpose, make sure your welcome email is set up appropriately, as under:
System Emails → Your Automated Emails → Mailing List Signup Confirmed
Questionnaires
Forms can also be used to collect more detailed information from your clients — for example, onboarding details, product preferences, or project-specific information. Note: you can add information-gathering questions to a Lead or Mailing List form.
Responses
You can set up automated reply emails to mailing list and lead forms submitted.
Form responses can be linked to Contacts and (coming up) Projects, keeping everything organised in the most relevant place.
Create & Edit Forms
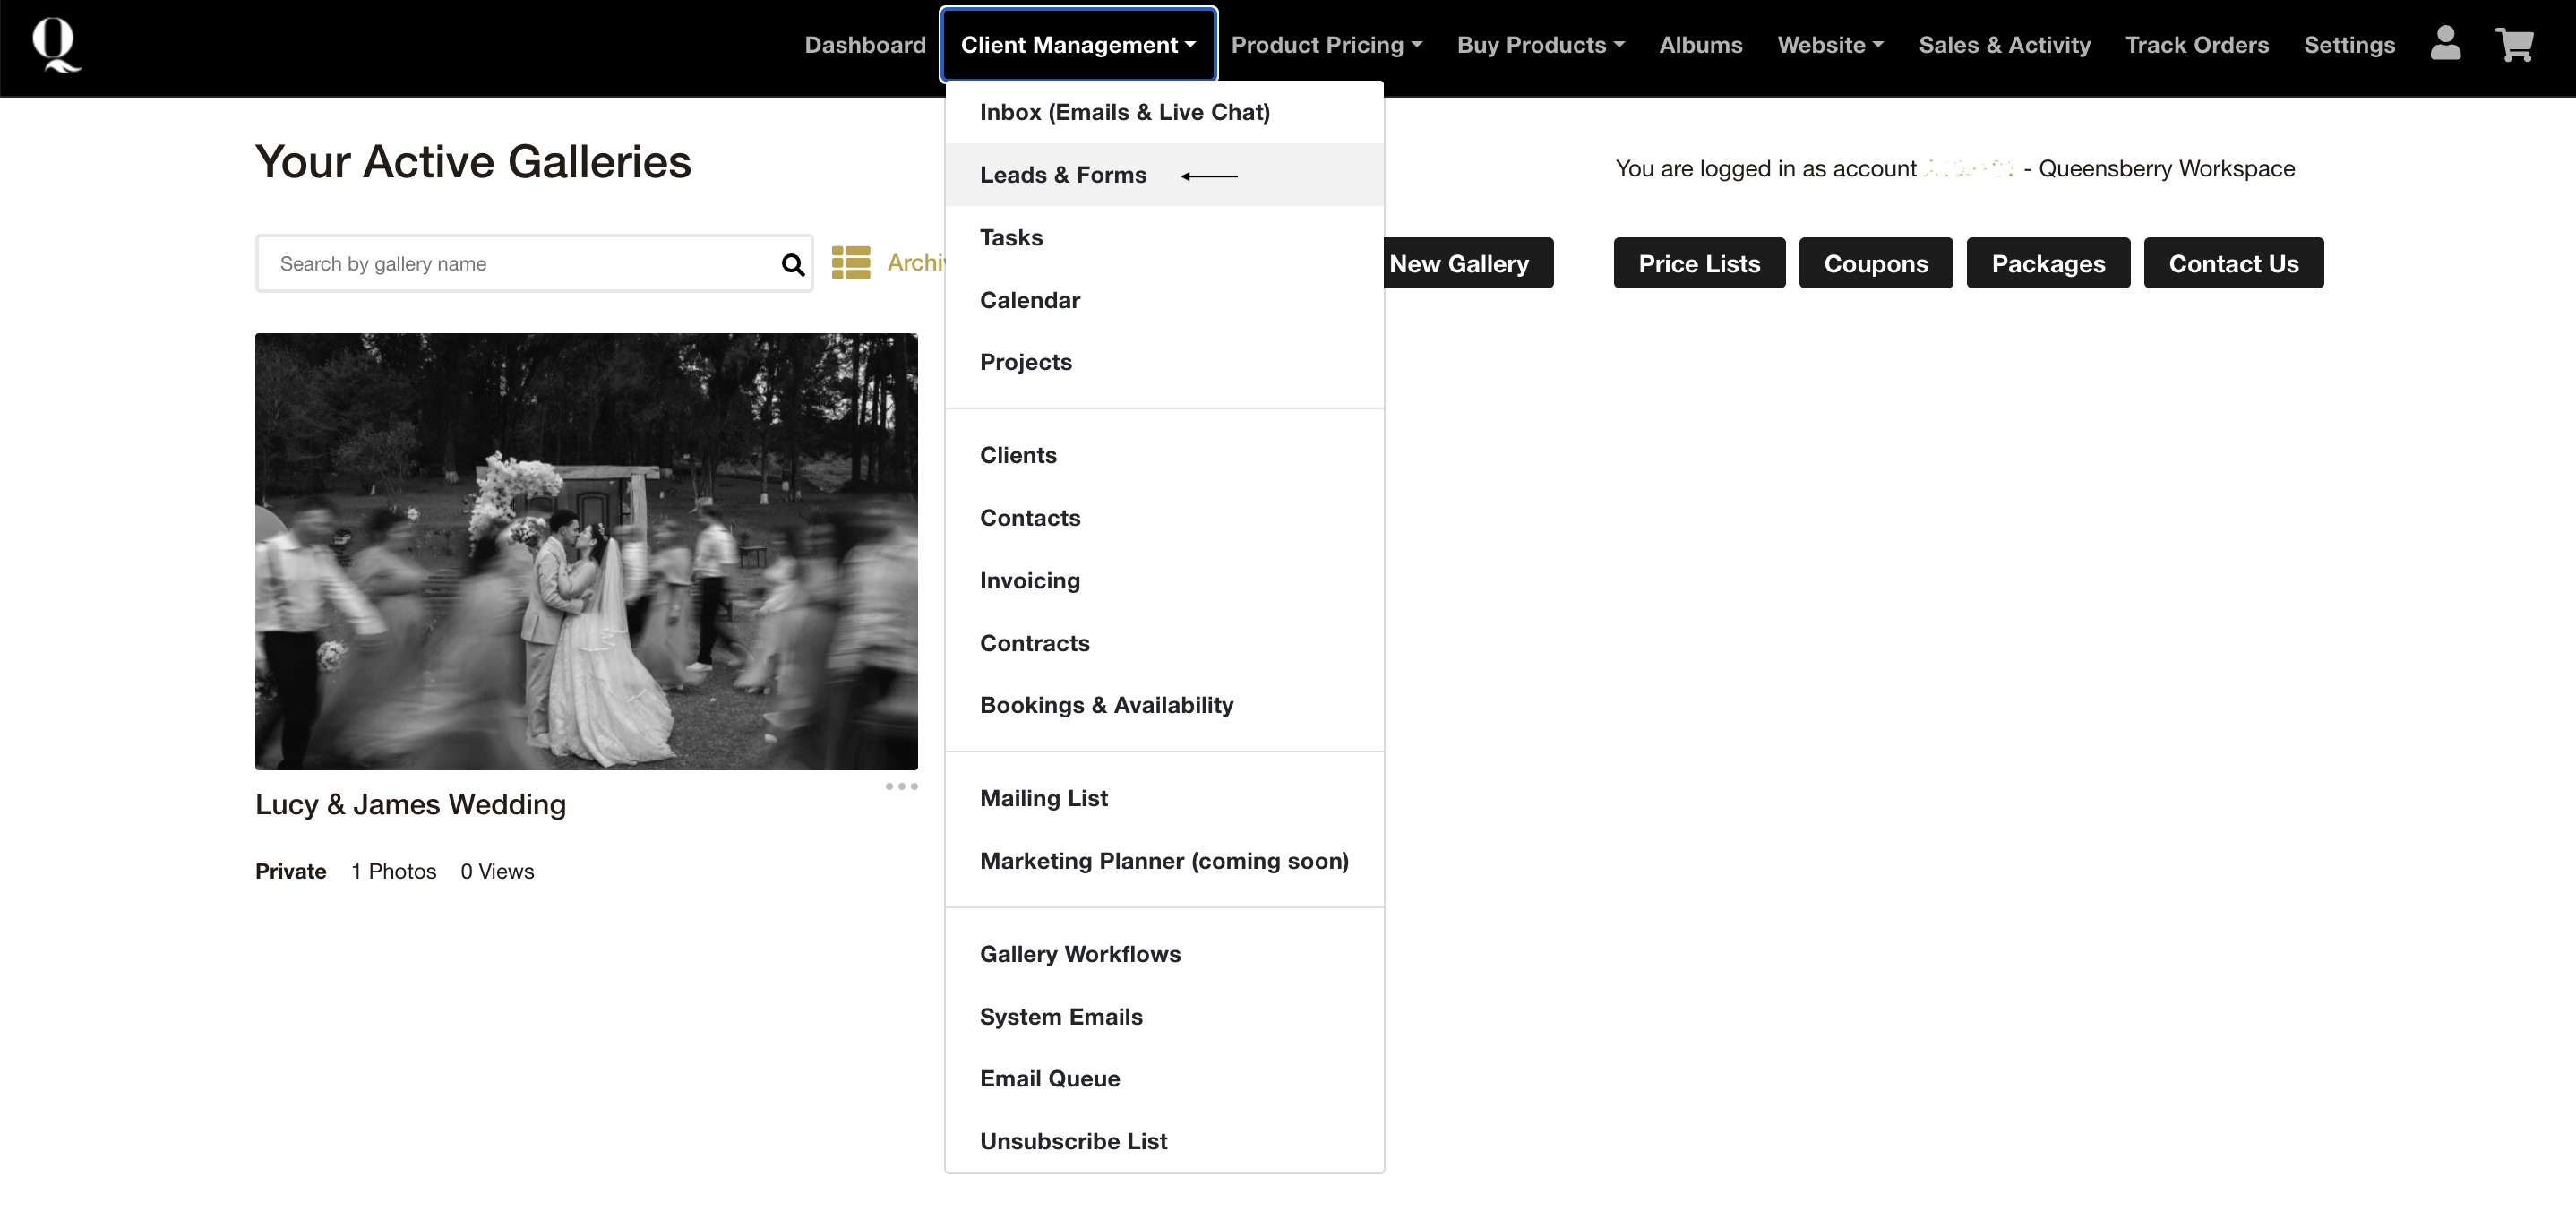
- In Workspace, go to the top navigation menu
- Select Client Management
- Click Forms
Here you can access existing forms, create new ones or edit the templates provided.
The Form Editor
To create a new form you can either:
- Use a template (recommended for faster setup).
- Create a new form from scratch.,
Option 1: Use a form template
Templates are a quick way to get started with pre-built form structures.
- Select Form Templates
- Preview the available templates, e.g. Mailing List Sign Up, Contact Form, Wedding Questionnaire.
- Click Copy Form for the chosen template to create a new form.
- Click Edit next to your new form to go to the form editor so you can customise it.
Option 2: Create a New Form
Click New Form. You will be taken directly to the form editor.
Set Up Your Form Content
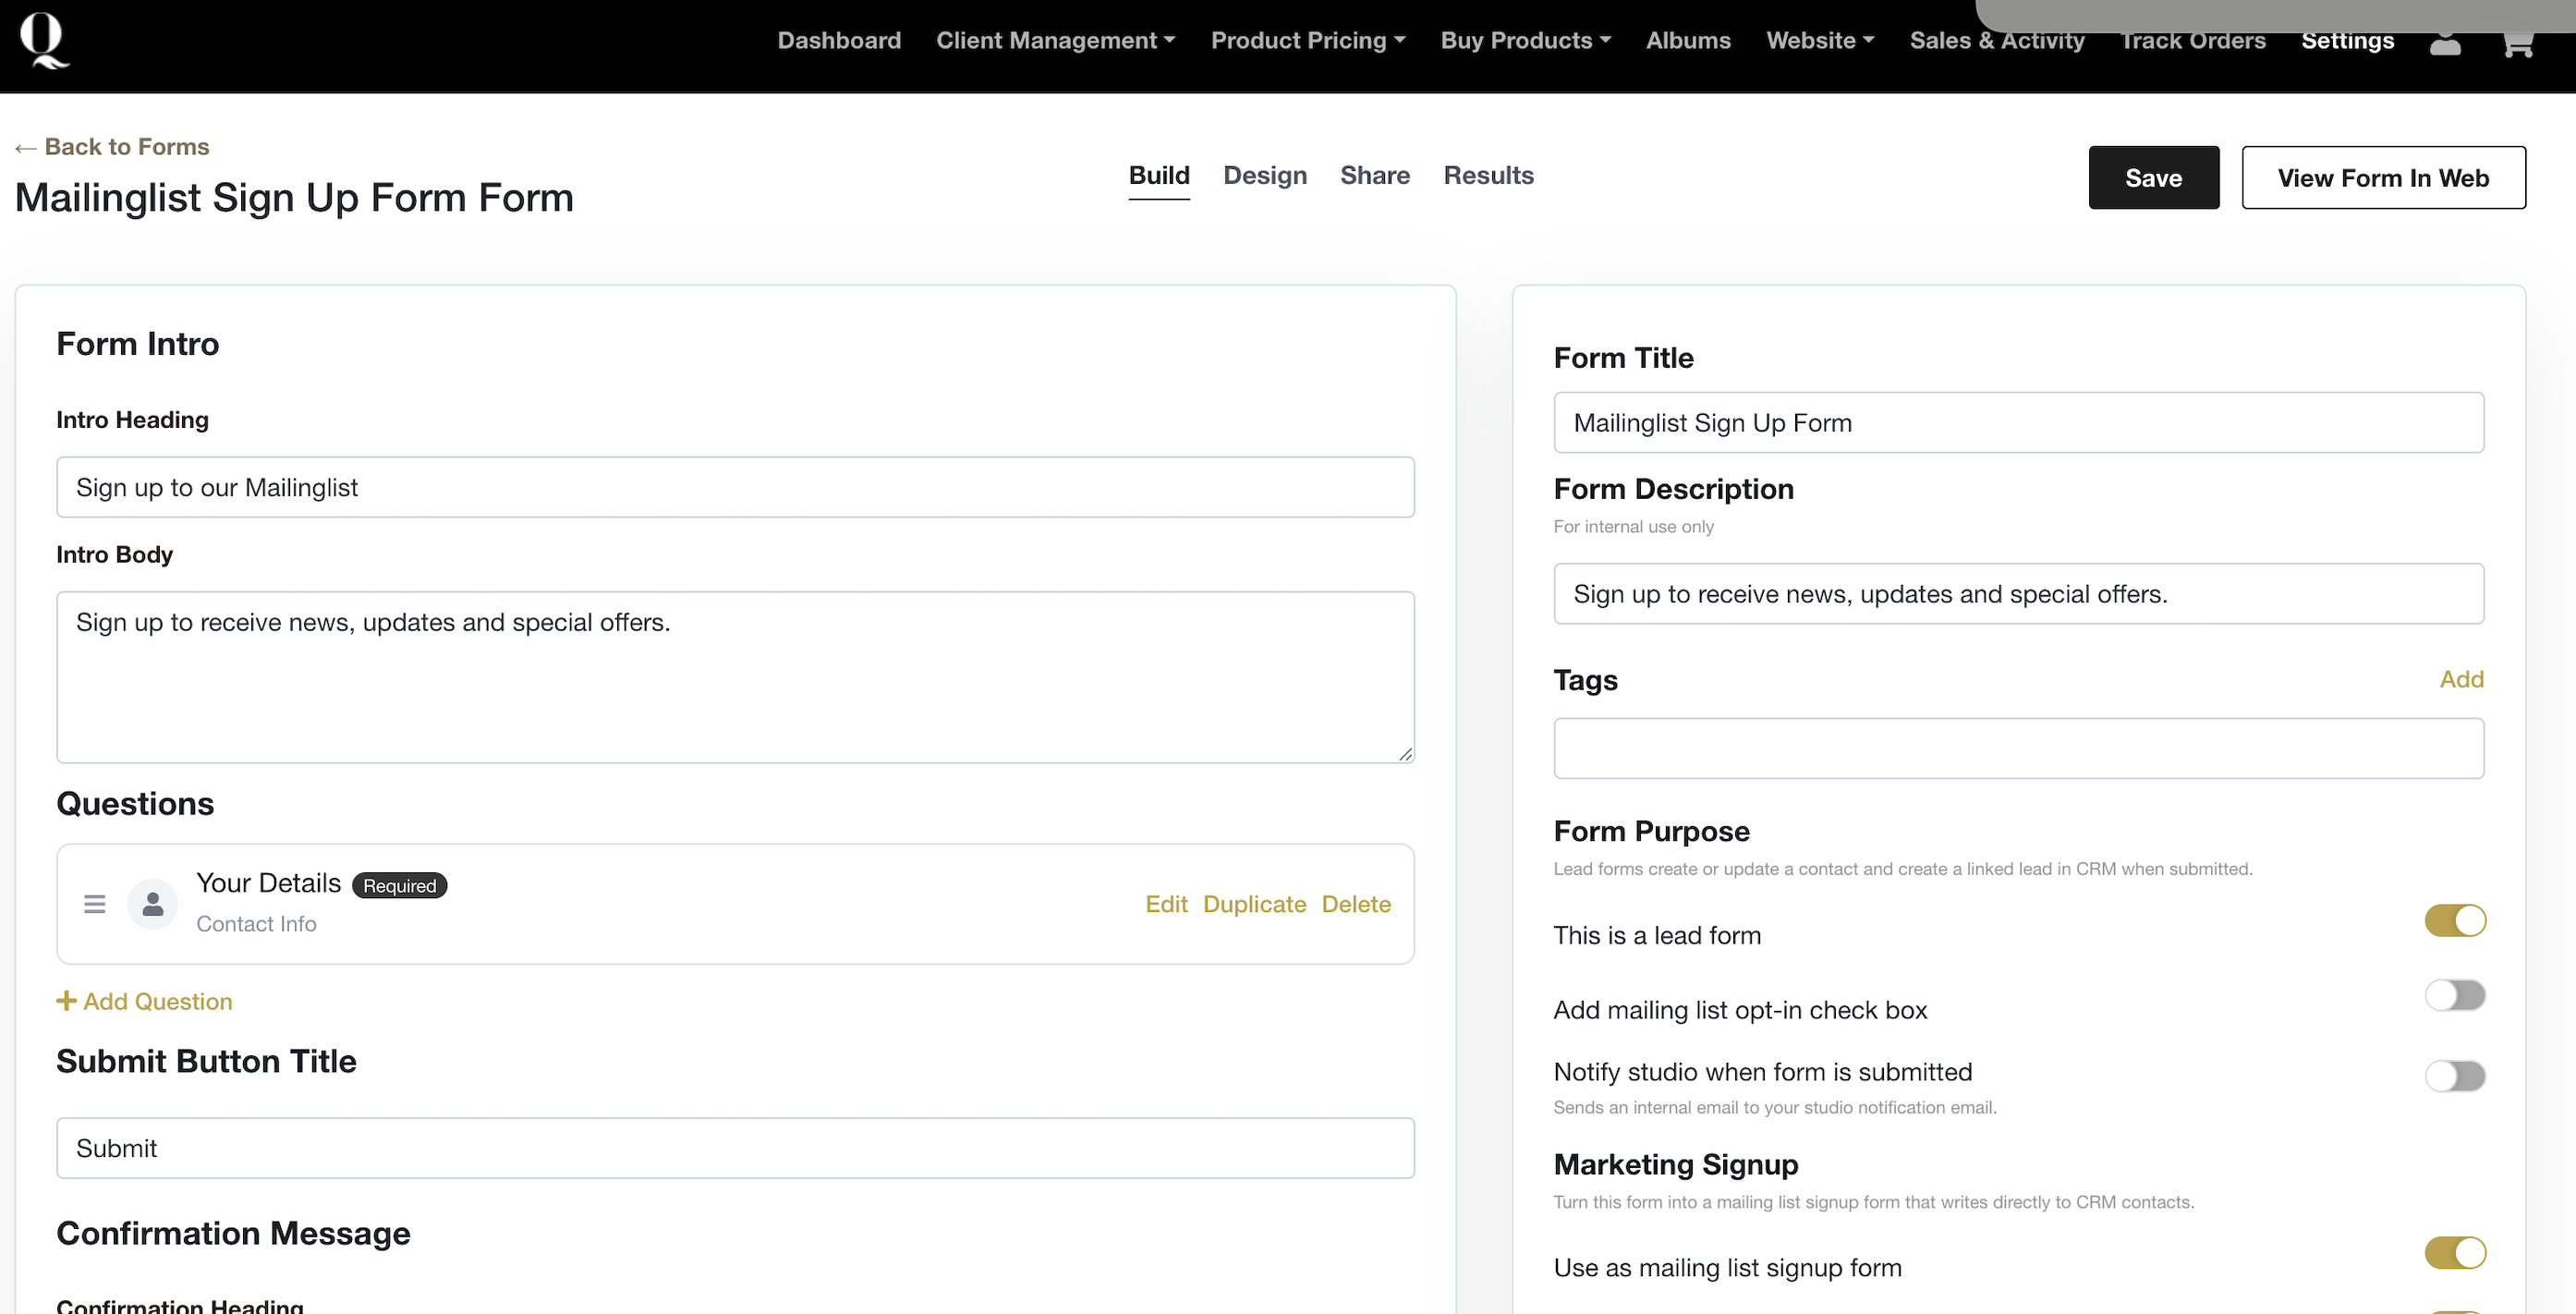
The Form Editor opens on the Build tab.
Form Introduction
Add a clear introduction for your clients:
- Intro Heading
- Intro Body
Form Questions
Add and customise fields such as:
- Contact information
- Multiple choice questions
- Date selection
- Custom questions specific to your workflow
Additional questions can be added to any form.
Submit Button
- Set an appropriate button title (e.g. Submit, Send Enquiry, Get in Touch)
Confirmation Message
- Add the message clients will see after submitting the form.
- Enter a confirmation button title.
- Add a redirect URL (where the enquirer will be directed after confirming).
Form Title
Complete the following:
- Form Title & Description (internal)
- Tags (e.g. weddings, portraits, commercial)
Form purpose
This refers to the three reasons for creating forms — capturing leads, growing your mailing list, and collecting information from clients. You can "mix and match" these purposes to suit your needs.
Use the on/off toggles to:
- Set up as a lead form.
- If so, you can add a mailing list opt-in check box.
- You can receive email notifications when forms are submitted .
- Alternatively, set up as a mailing list sign-up form.
- If so, opt-in is automatic (unless double opt-in is selected).
- Sign-ups are automatically added to your mailing list.
Form Type
When you've created your form Workspace will assess it and declare its "type" in the list of your forms, e.g. Questionnaire, Lead Form, Lead Form + Mailing List Sign Up.
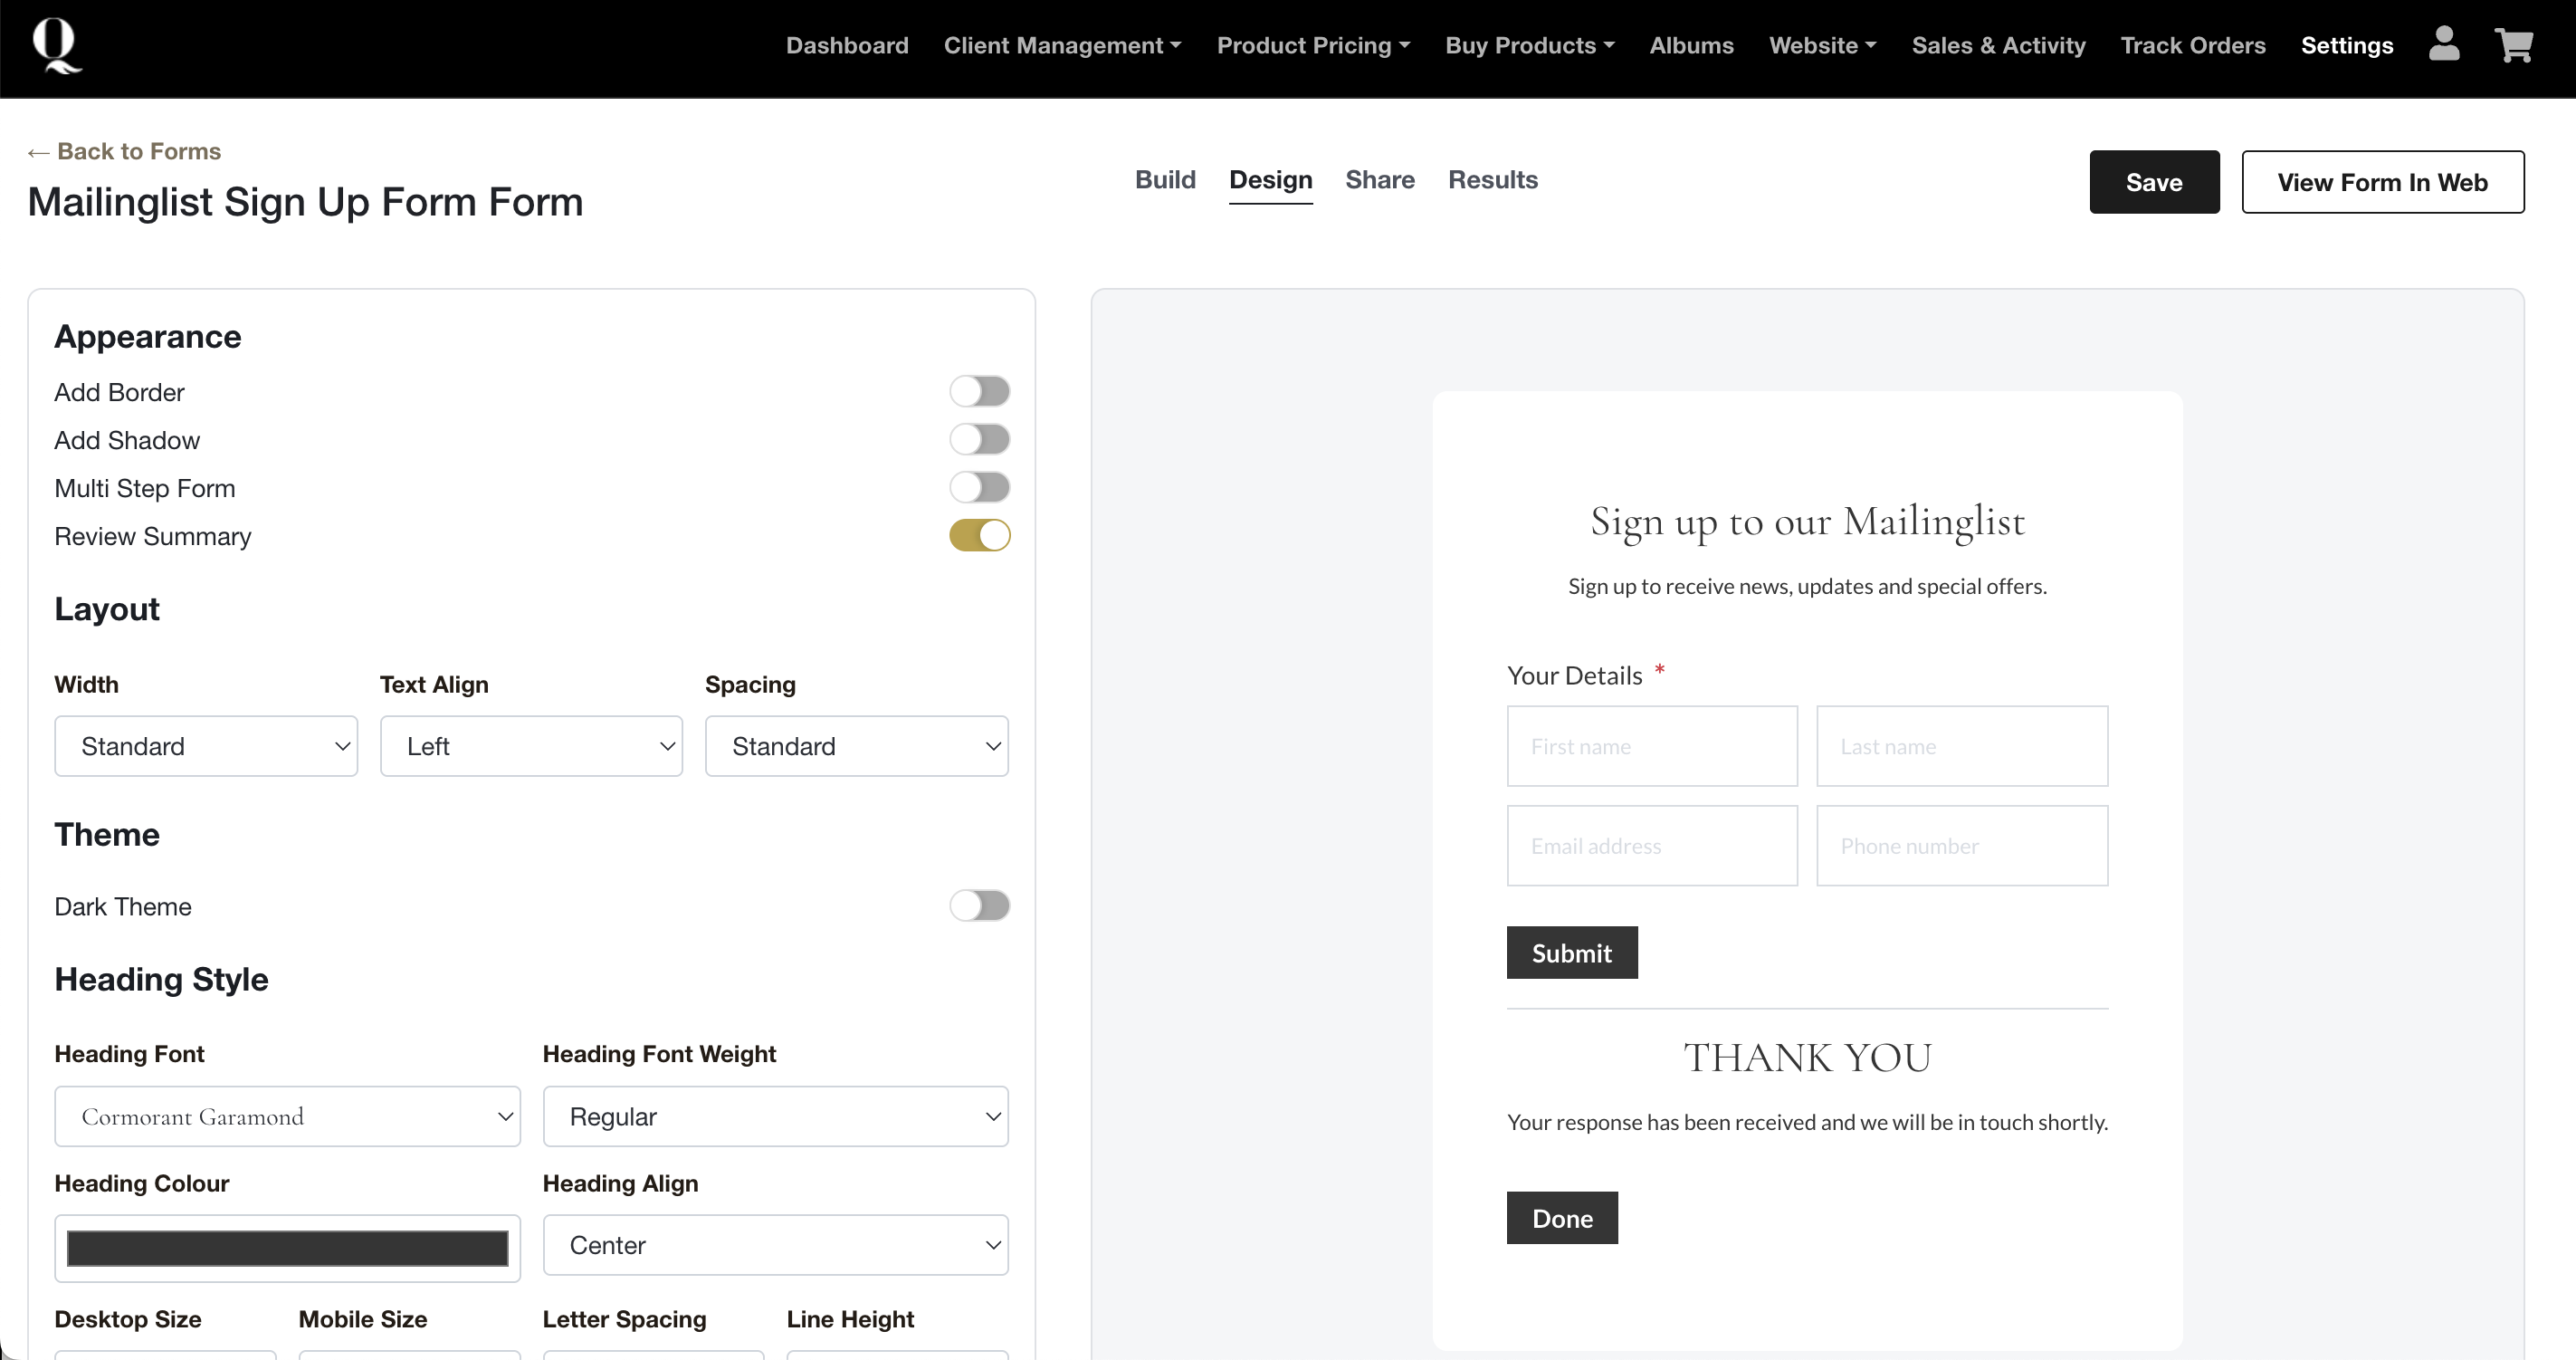
Customise Your Form's Appearance
Click the Design tab at the top of the page
Adjust the form’s:
- Layout and width
- Theme
- Fonts
- Button styling
- Overall appearance
Share Your Form
Click Share at the top of the page. Choose how you’d like to share:
Option A: Direct Link
- Copy the Form URL and send it to clients.
Option B: Add the Form to Your Workspace Website
- Go to Website in the navigation.
- Select Website Pages.
- Choose or create the page where your form will live.
- Click the “+” button in a blank section.
- Or click “+ More Widgets” in an existing section.
- Select the Form widget and select your correct form.
Option C: Embed on Your Website
- Copy the Embed Code and embed it on your website.
Tips
- Keep forms short and focused to improve completion rates.
- Ask only for essential information up front.
- Use tags to keep your leads organised.
- Match your form design to your brand for a consistent client experience.
Review form responses
In Workspace, go to the top navigation menu
- Select Client Management, then
- Click Leads, or
- Click Mailing List.
You can also Select Client Management / Forms to review responses to each form.
Responses are linked automatically to the relevant Contact.


